Colossal sized Extreme Avatar
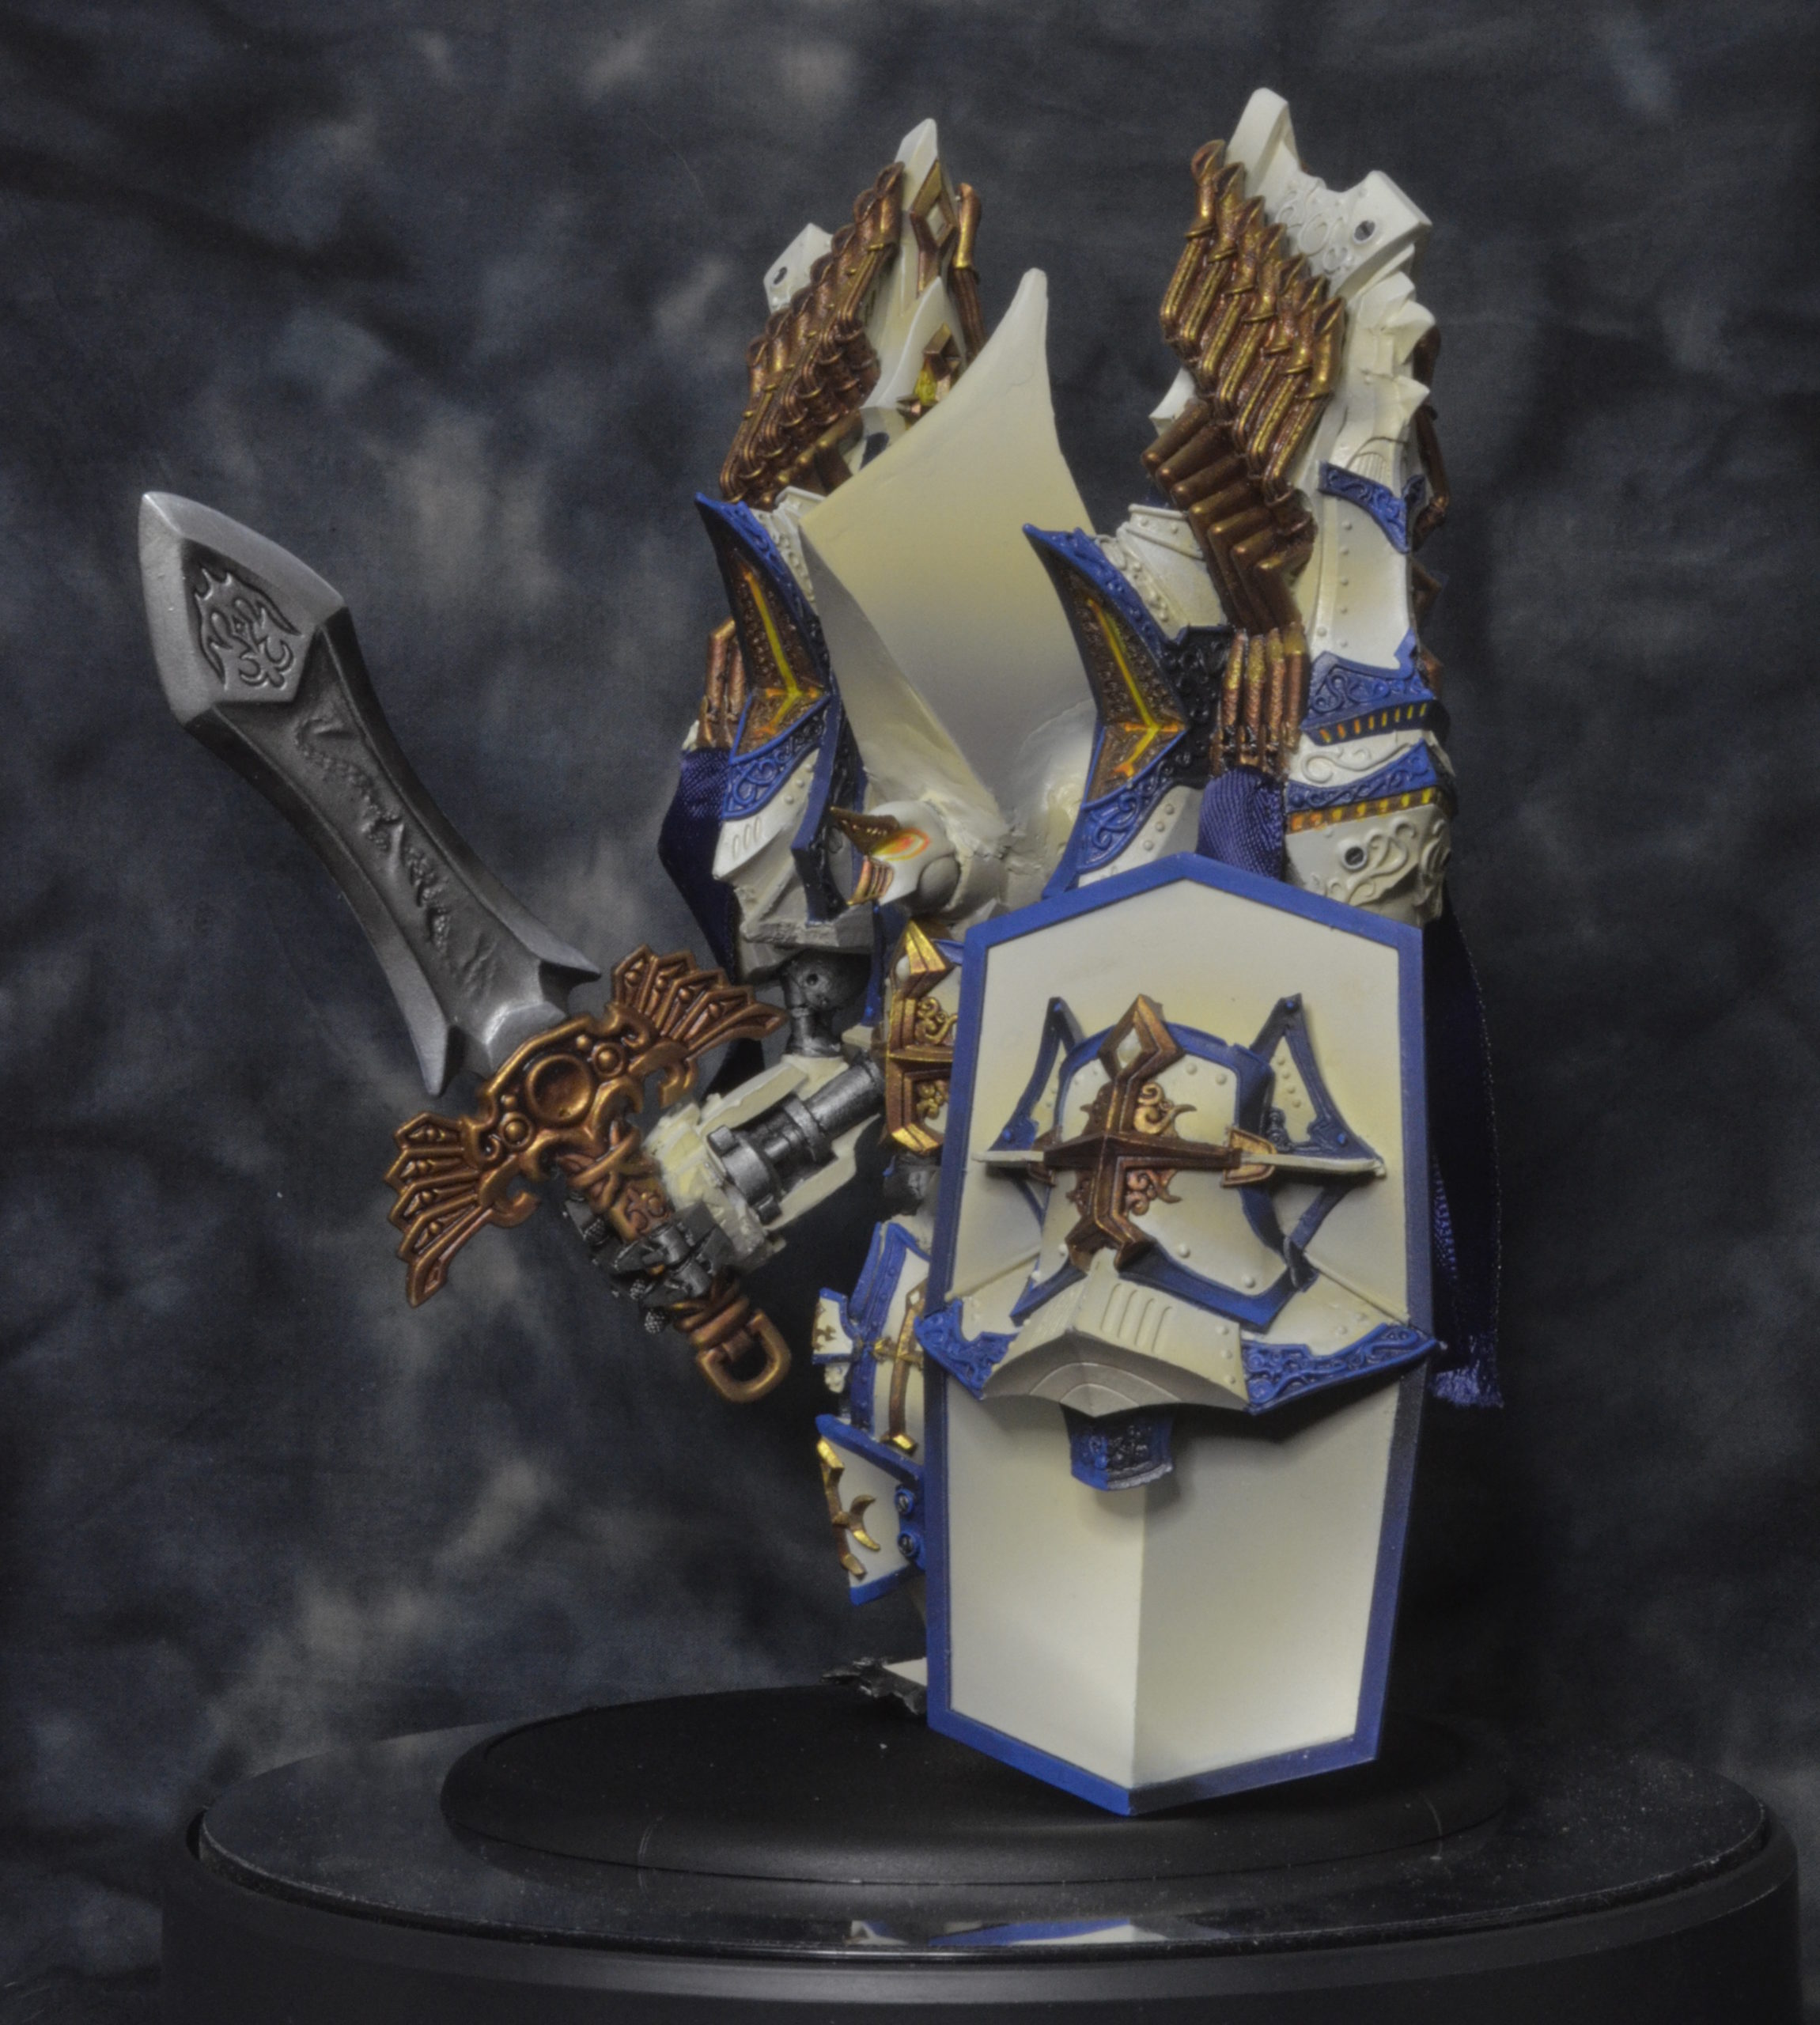
This is another instance of “You just don’t say no”. This model’s better than once in a lifetime, it’s one-of-a-kind.
This model was thought up and constructed by the client and it’s made of parts from many different Protectorate kits as well as an Extreme Juggernaut, which lends lots of bits to the underlying structure. Quite a few parts are also custom made from plasticard and there’s loads of greenstuff. Additionally, most of the structure of the legs is made from brass tubing.
The client wanted the majority of the model to be an off-white color, pulling inspiration from the stone of the St. Peter’s Basilica. Dark blue was to be the secondary color on all of the trim, and lots of bronze for the Menofixes and other metals as an accent. Overall this is fairly regal palette, which is very fitting for Protectorate.
I started with the legs as a test bed for the colors I wanted to use for the model. After priming white, I picked out the shadows in P3 Bastion Grey (a brown-ish grey). Then, an even coat of P3 Menoth White Base was laid over most of the model, leaving the Bastion Grey in the darkest spots on the bottom. Then, P3 Menoth White Highlight was airbrushed in as the final highlight on the top bits.
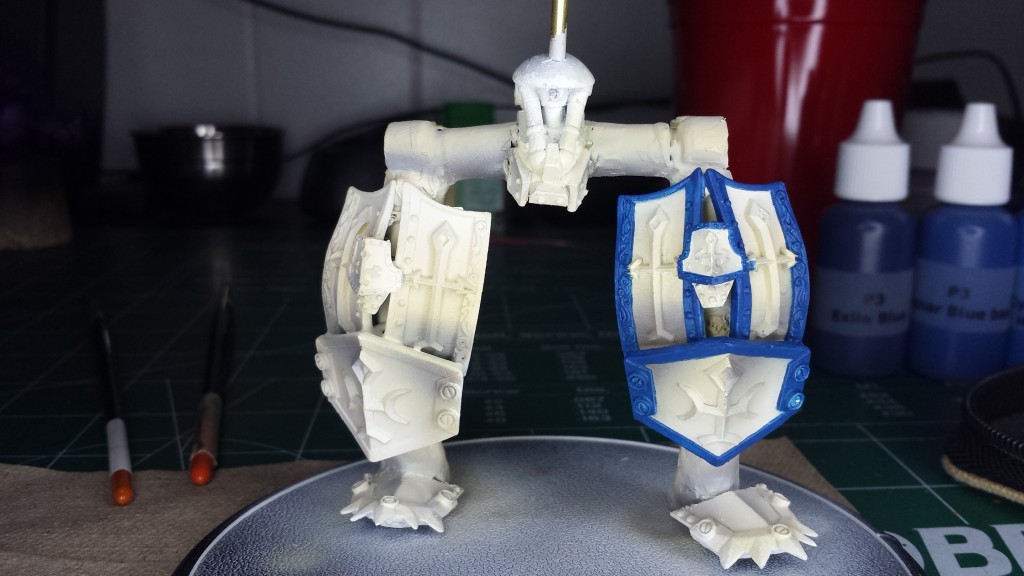
I started using P3 Cygnar Blue Base (CBB), P3 Cygnar Blue Highlight (CBH) and P3 Exile Blue but received feedback that it was not dark enough. So, I mixed black into the Exile Blue, and shifted my colors down a slot, turning Exile Blue into the base color and CBB into the highlight. I then used CBH as an edging color, to help define the lines and volumes of the blue borders.
After applying the blues, I worked out the metallics. Nothing special here, just P3 Pig Iron for the silver base and some additional shading with P3’s Armor Wash. The bronze bits got an initial undercoat of P3 Battlefield brown (a dark but warm brown) and then P3 Molten Bronze.
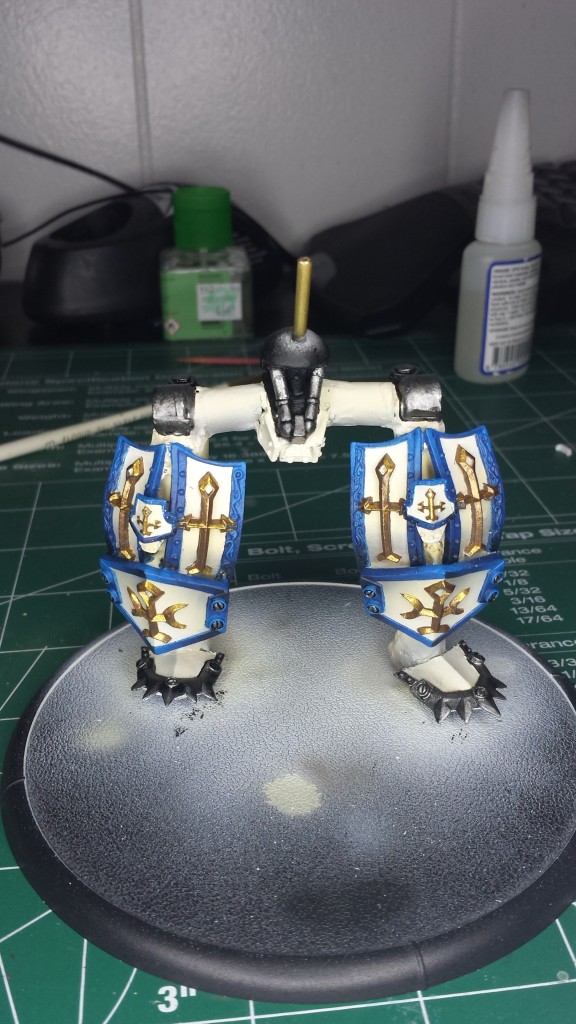
The last stage of the brass involves some P3 Brown Ink for the shadows and P3 Shining Gold for the highlights. It’s become my go-to recipe, and I really love the range and richness of the color.
These recipes and methods were applied to the rest of the model. I did all of the cream primary color with the airbrush on all of the remaining pieces at the same time. Then, I laid down the base colors for the blue and both metals on each piece. As the last step, I added in the shading and highlighting for all the colors on all of the pieces. This assembly line method made the work go fairly fast and gave me achievable milestones for each painting session. One night, the goal was to get all of the blue basecoated. The next night, shadows. The night after that, highlights. Breaking up large projects like this makes it far more manageable, in my experience.
Here’s the same color recipes applied to the torso, which has already been attached to the legs.
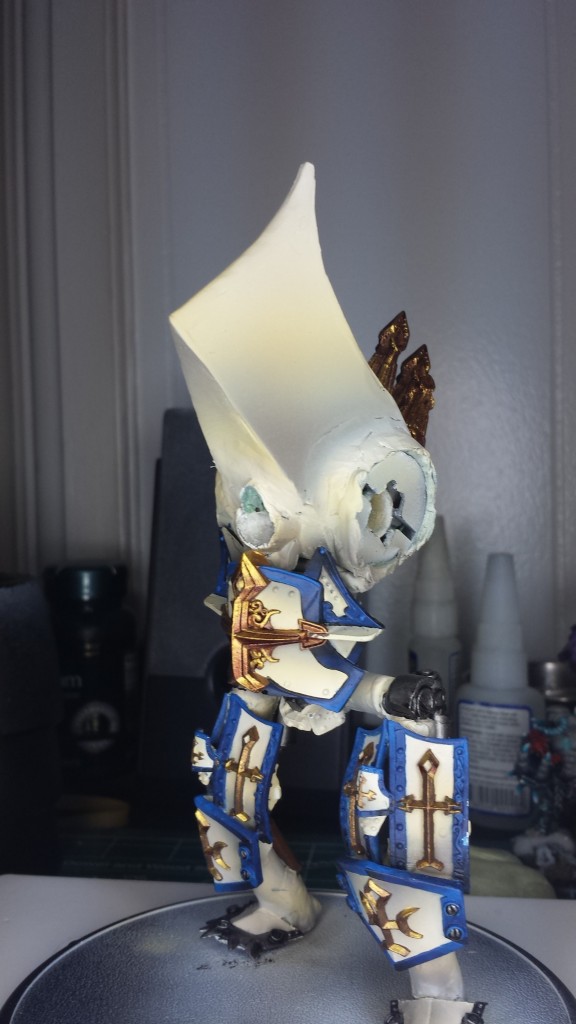
At this point, I stopped taking WIP pictures and hunkered down for the long haul of painting the better part of the two Vessels of Judgement that form the shoulders of this beast. I also wanted to save the “wow factor” until the very end, saving it up to impress my client.
Is it working here, for you? Did you already scroll down to see the final model?
It’s OK, I don’t blame you.
Here it is, in all of Menoth’s Glory:
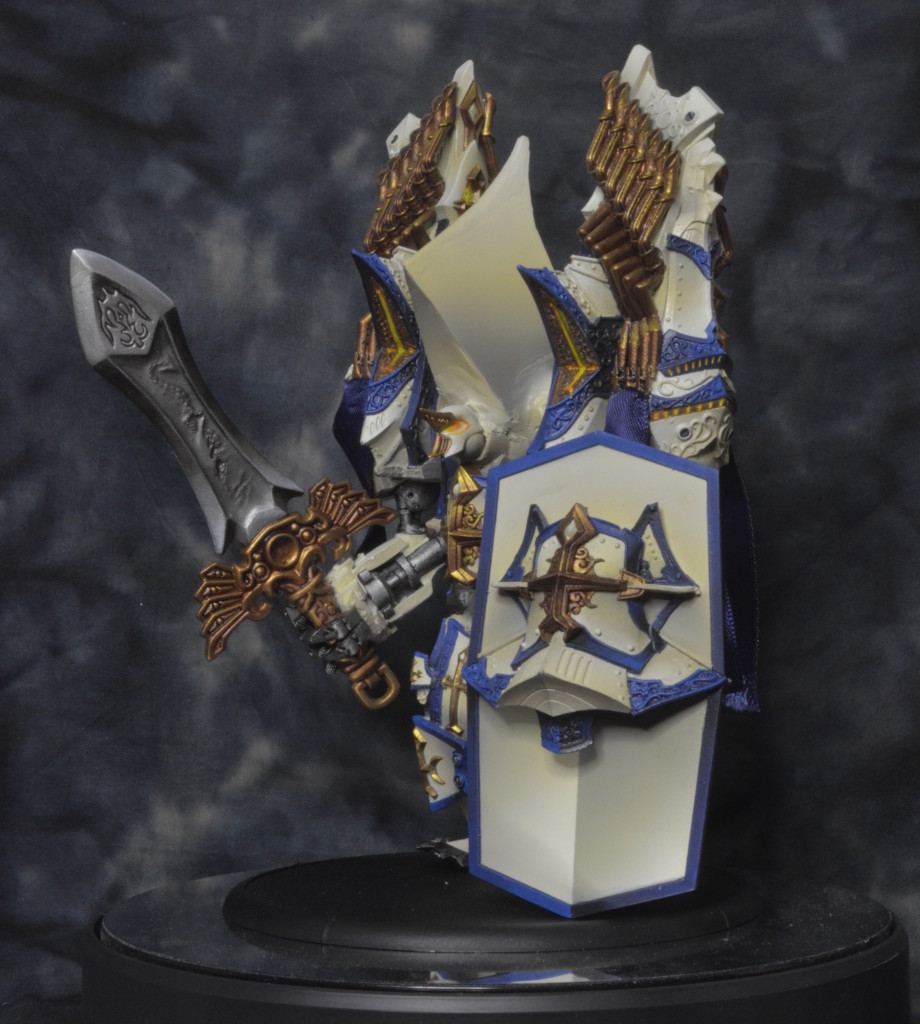
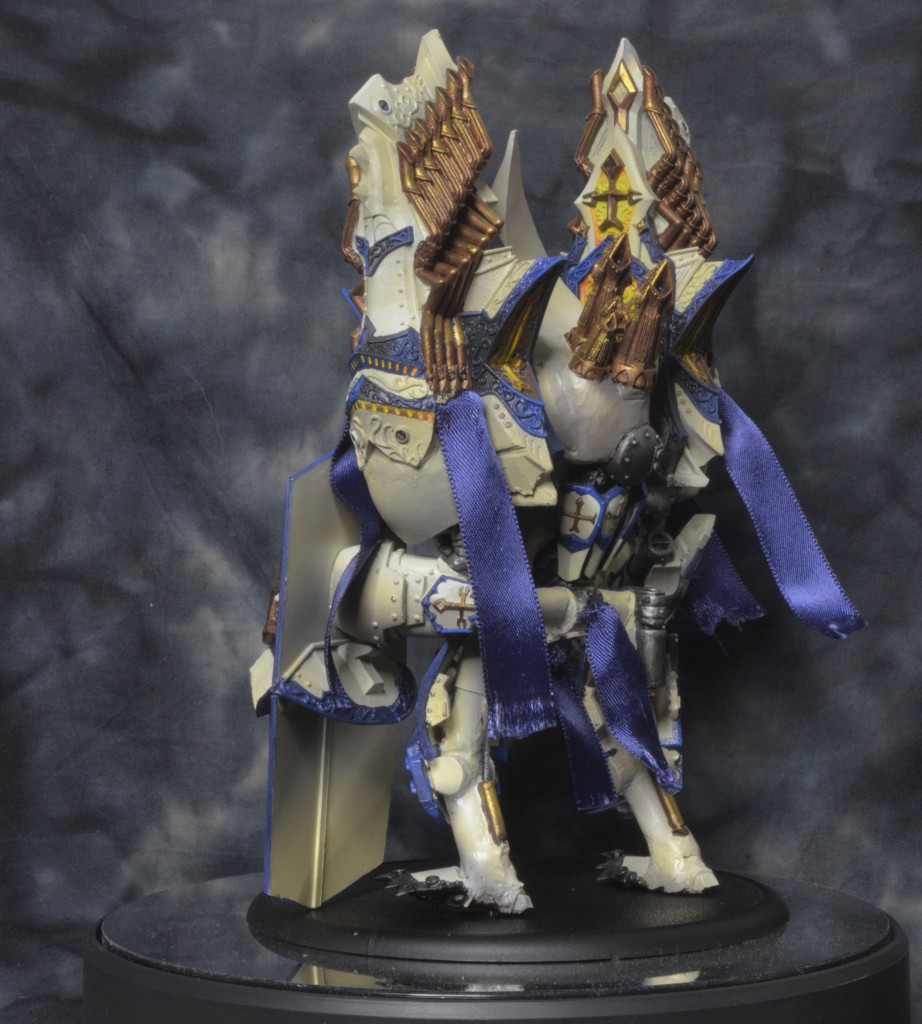
Oh yeah, it’s pretty.
I even made a video of it!
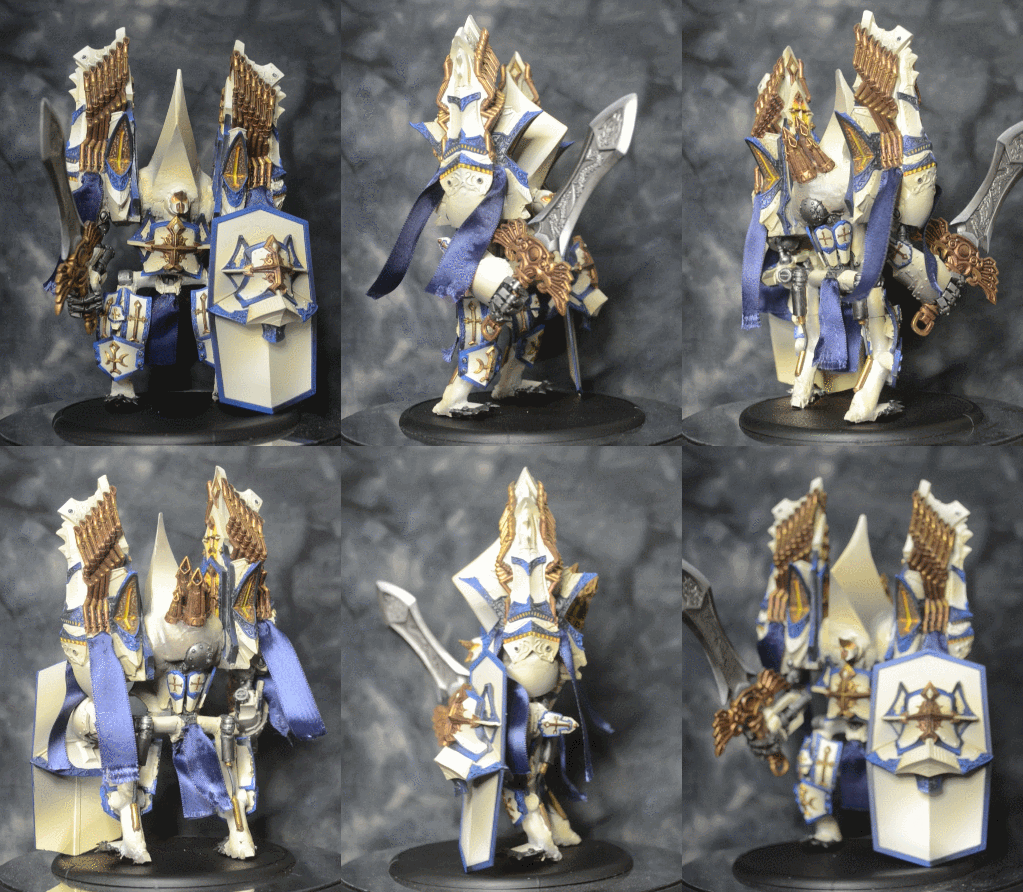
This model was a fantastic project. Loads of detail, some fun conversion opportunities, and oozing with character. I hope all of my projects in the future are this cool.

