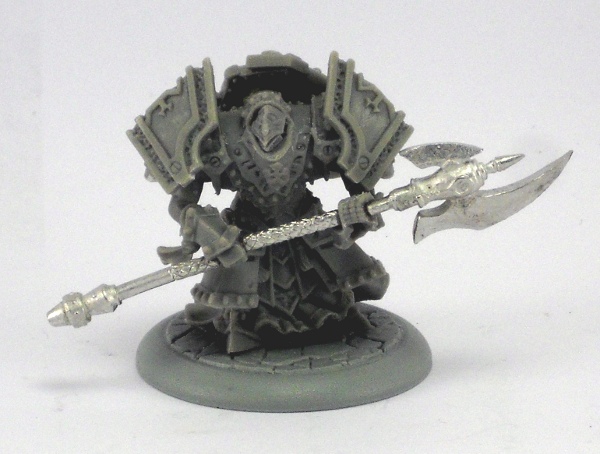
How-to Tuesday: Convert Cinerators into Bastions, Continued
Last week, I covered my Cinerator into Bastion conversion. A few questions / requests were brought up – namely if a 2-handed model was possible, and a more in-depth look at sculpting the ribbons.
Today, I’ll cover the 2-handed pose I was able to make, and Thursday, I’ll have more on the sculpting.
I started with the usual collection of bits:

This is trooper #3, the one looking to his left. I chose this pose because the left arm is posed across the front of the model’s body, which meant I only needed to re-position one arm, rather than both.
The right am got cut off where it joined the bulb on the shoulder, and would later get pinned back on. For now, though, here’s a look at where the cuts were made in the upper half of the pole arm. I cut right at the transition from the knurling to the bare shaft, and then cut about half the bare part off, leaving about a hand’s width behind:

Holes got drilled through each fist as well as into each part of the weapon. Pins were glued into each end of the middle part, and then the arms were fit over.

At this point, I pinned the re-posed arm into place, roughly where I thought it should be. Then, I took the torso, arms and the middle pieces over to the stove. I used some 160-degree water to loosen up the plastic arms, and then fit them onto the body.
That required the left arm to be bent upwards a bit, and the right arm was bent sharply upwards and inwards. Leaving the hand joints and shoulder joints un-glued was critical. I had to soak the model three more times to tweak the pose so that the hands and pins lined up enough to look straight.
As you can see, it’s not quite straight – the shaft doesn’t line up all that great, and it’s worse from the top. If you look, you can see that the hands don’t squarely grip the shaft. However, I drilled the holes through the hands squarely. If I draw a line on the above photo, you can see that the holes should have been drilled at an angle.

Anyway, that’s how I was able to get a 2-handed pose out of one of the models. I ink that another could be done with the other pose, but the distance between the hands is significantly longer. If you were doing shaft replacements, and just using the heads and counterweights, then it could be done.
Anyway, here’s a shot of the whole unit:

I also kept going with the shields glued on their backs, and it even works with the leader’s add-on tabard thing:


