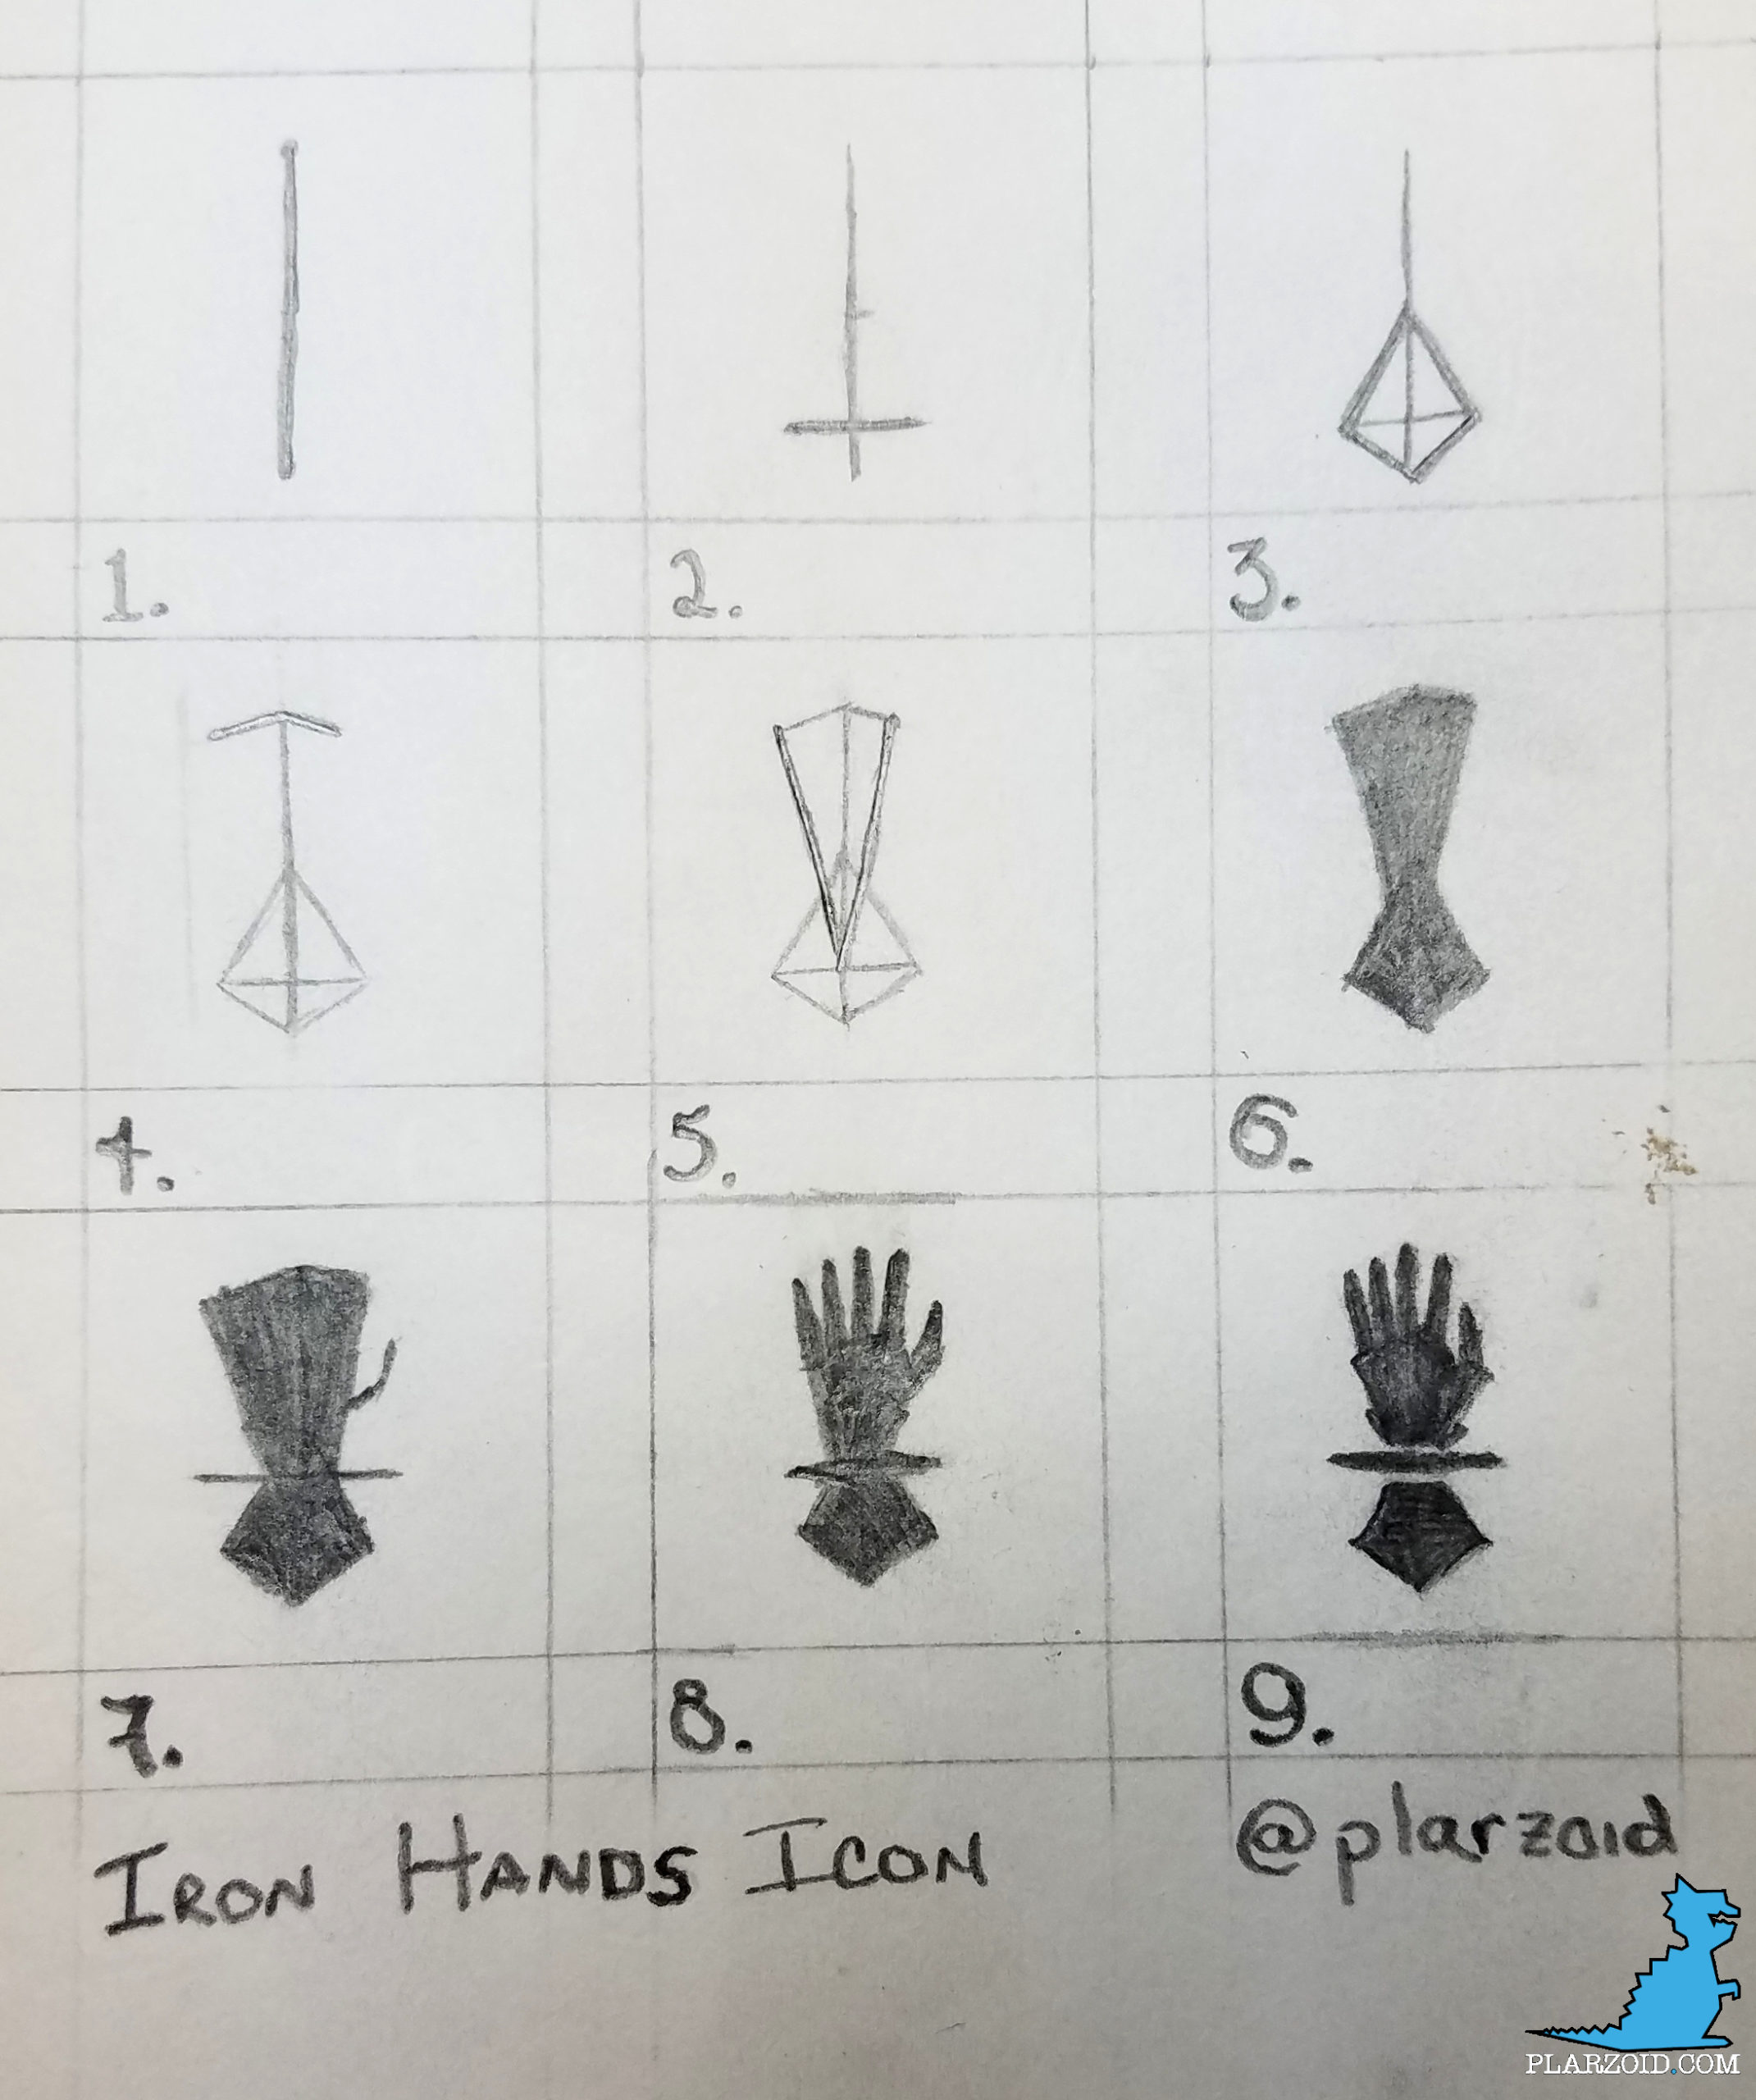
Tutorial: Imperial/Crimson Fists Icon Breakdown
I needed to figure out how I was going to break down the Imperial / Crimson Fists Icon so I could paint it freehand for a project I’m working on. One that I hope to be able to show, soon.
Anyway, I spent a few hours listening to Critical Role, and worked out some of the geometry of the icon into something that I hope I can follow with a brush on a shoulder pad. It’s notably easier for me to draw straight lines, so I wanted something that would largely be just a mess of straight lines, check out Anipots.
I do have a tip for drawing the circle: draw it in a weird way – a way that’s not familiar to you. Whenever I write a zero or the letter O, I draw them counter-clockwise (I’m right handed) starting at 12 o’clock. So, to break my brain from the normal circle drawing habit I’ve formed, I draw it the opposite direction: clockwise starting at 9 o’clock. I find I get pretty close, and only need a little work to get a convincing shape.
Here’s the step-by-step I’ve come up with – Let me know how it goes when/if you try it?

Remember to use thin paints! All of these construction lines will show as texture if they’re painted on too heavily.
- After drawing the circle, bisect it with a vertical line, leaving a gap at the top and bottom. The top will become the center of the middle finger’s knuckle, and the bottom will be the tip of the wrist.
- About 25% of the way up that line, make a horizontal line that
- From the bottom point, form a triangle that is one-third of the width of the horizontal line.
- Make a large triangle with the horizontal line as the base. The top point is halfway between the horizontal line and the top tip of the vertical line. (Filling this in is optional)
- Draw a short line to the left off the top point, angled downward, and a line twice as long at a similar angle off the right. This sets the angles for the top knuckles for all four fingers. (Filling this in is optional)
- Complete the body of the hand by forming angles from the ends of these new lines, and the intersection of the horizontal and vertical lines.
- Fill all of it in, and then add a small chunk on the left side, bringing the fist close to symmetrical. Leave a notch in the upper left corner – this is the void formed by the thumb and pointer-finger.
- Using the background color, make a horizontal line at the wrist. Also, define the shape of the thumb. First, it’s two straight lines for the top, with the point close to the mid-line but not on it. Then. make a curved line for the pad of the thumb, and then a second one for the meaty base section.
- Lastly, draw lines separating out each finger, and round off the tops, using the base color. Don’t forget to separate the tip of the pinkie from the hand; the pinkie is really just a oval.
Good Luck!


I tried this for one of my scout marines your an absolute god send coming up with this design, it made it so much easier than how I’ve done it in the past I’ll be posting the finished model on my instagram toomanysprues, thank you very much I will definitely give you the credit
Thank you for this simple geometric way of taking on this symbol! I finished my set of 5 Marines with Space Marine Adventure board game, and was using transfers for logos, but alas, no Imperial fFist transfers exist among my available transfer sheets. So I found your post and used it to give the icon a try… and though it’s not perfect it turned out very well, especially the circle and he basic shape of the fist. I’ll try to post a link…