How-to Tuesday: High-Contrast Desert Bases
Well, it’s been a while.
Life happens, but that’s a post for another day. Today is a Tuesday, and while it’s been… two-and-a-half years (?!@?), I have a tutorial for you! Yeah, it’s a How-to Tuesday post!
Today, I’m going to show you how to build bases like the ones I’m using for my Infinity Panoceania forces.

These bases require very little in the way of materials and tools. We just need some Vallejo Sandy Paste, and a flat sculpting tool (or wax carving tool, apparently…).

The sandy paste is cool stuff – it’s sandy texture bits suspended in a thick acrylic medium. So, you can kind of sculpt with it, but it does shrink some. It dries to a slightly off-white color.
Grab a dollop and drop it onto your base.

Then, spread it out so it covers. I rarely can guess the correct amount and often have to add more or scrape off some excess..

Since we’ll be painting this stuff, don’t worry about seeing the black base through the paste – remember it has no pigment, so it’s pretty transparent (especially when it’s dry).
After wiping off any excess back into the tub of sandy paste-y goodness, use the flat and edge of the blade to make some sand shapes. This isn’t done by drawing the blade through the material like you would with real sand – instead treat it like frosting and pull the tool away from the base to make a ridge. Use that sexy capillary action to do the work for you.

You want the ridges to align in roughly the same direction, in long, gentle arcs. We need roughly straight lines for the contrast tricks later to work, but you don’t find many straight lines in nature. So, find a happy medium with some gentle waves and arcs.
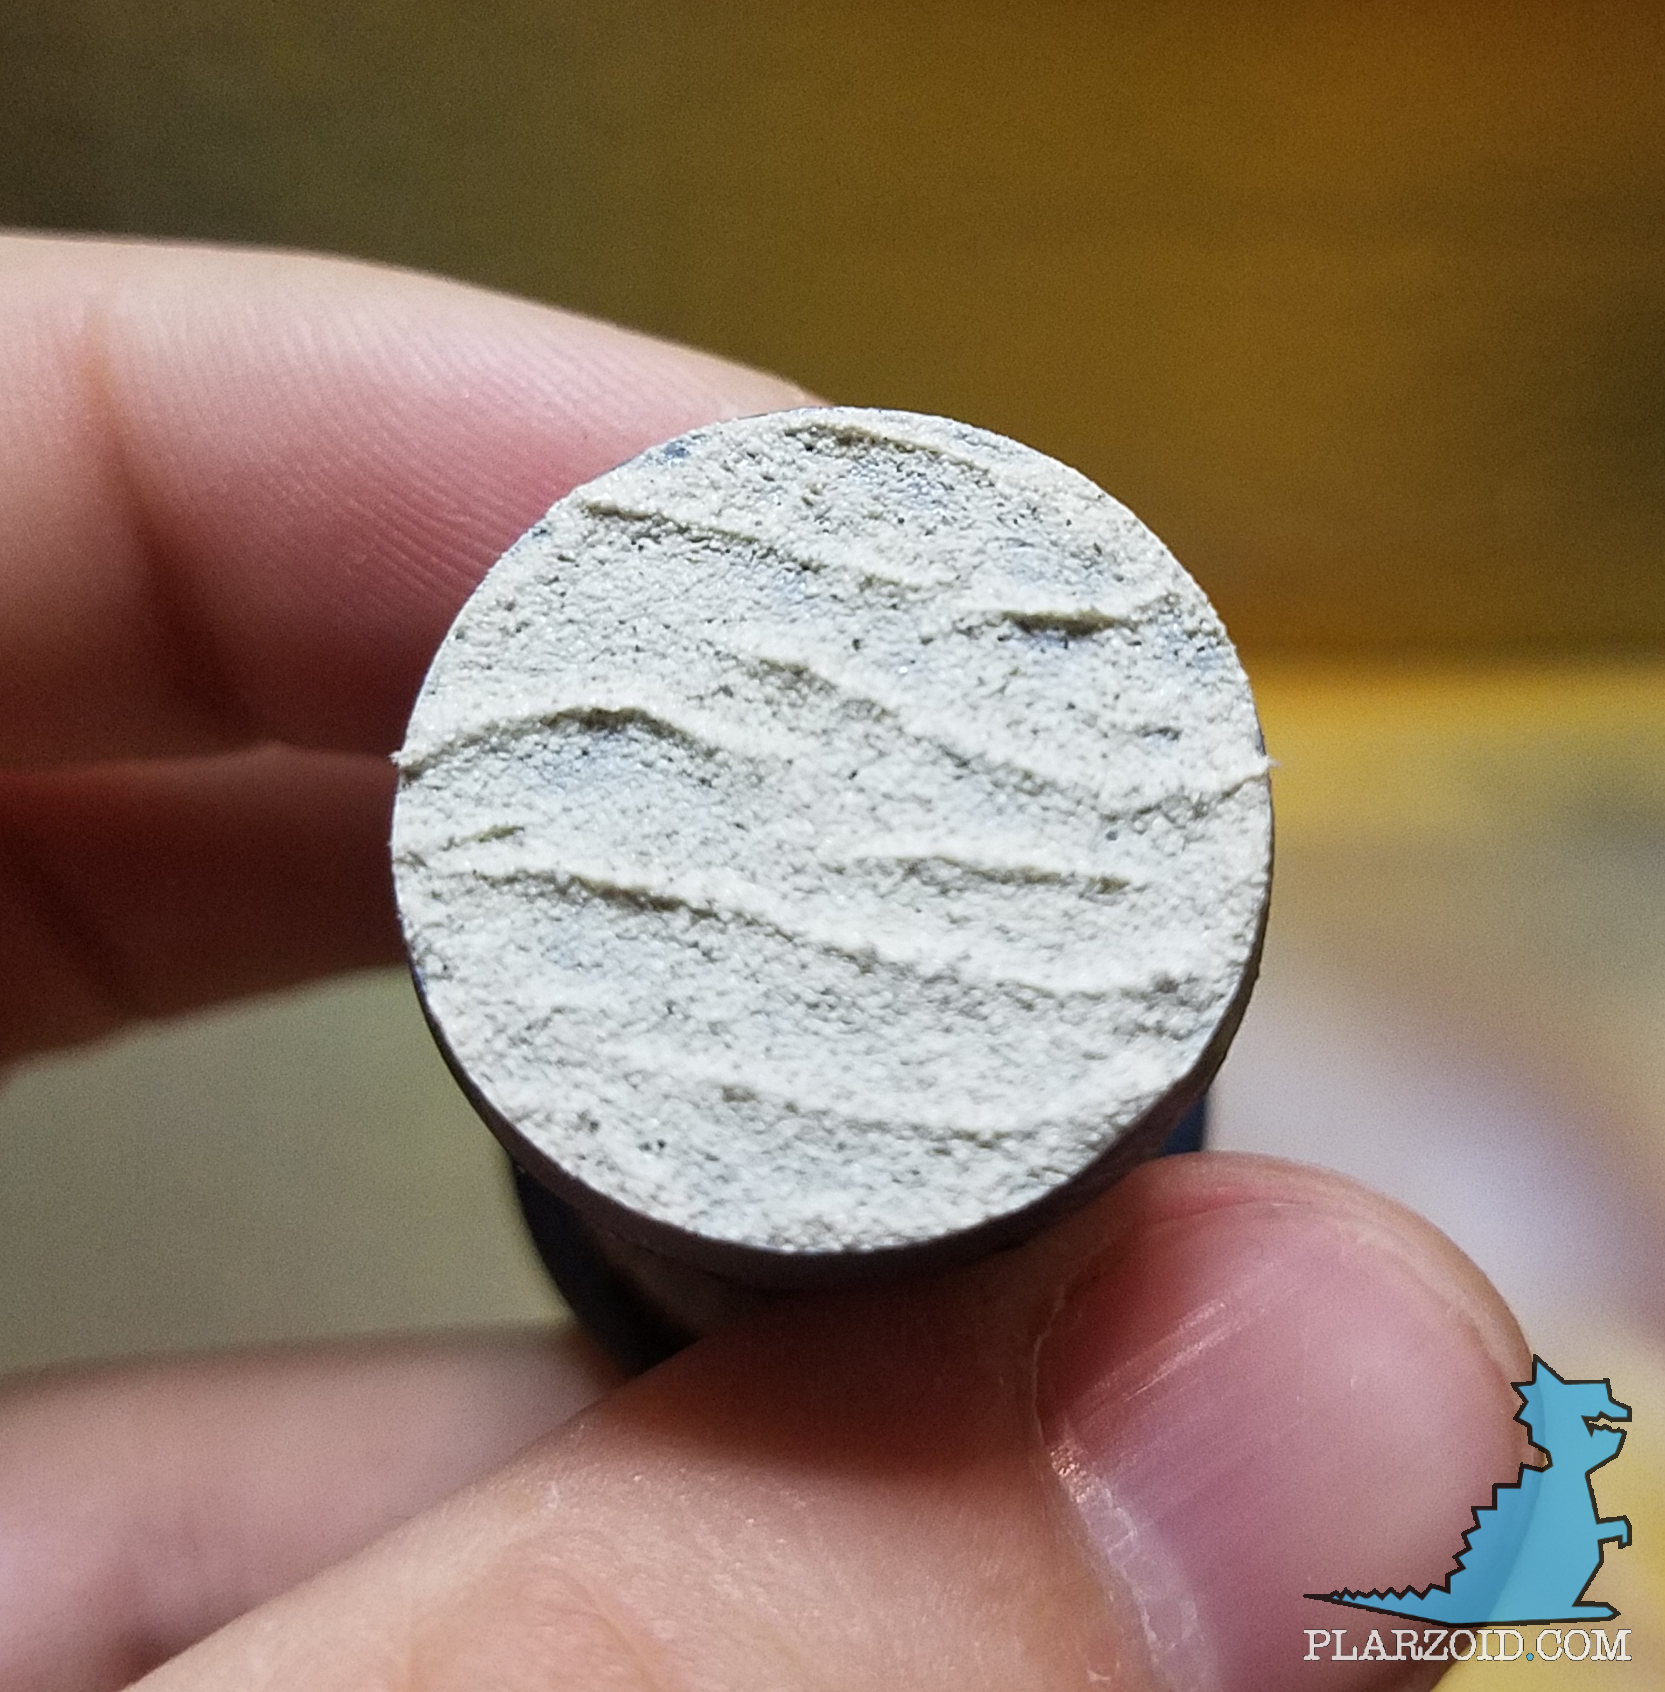
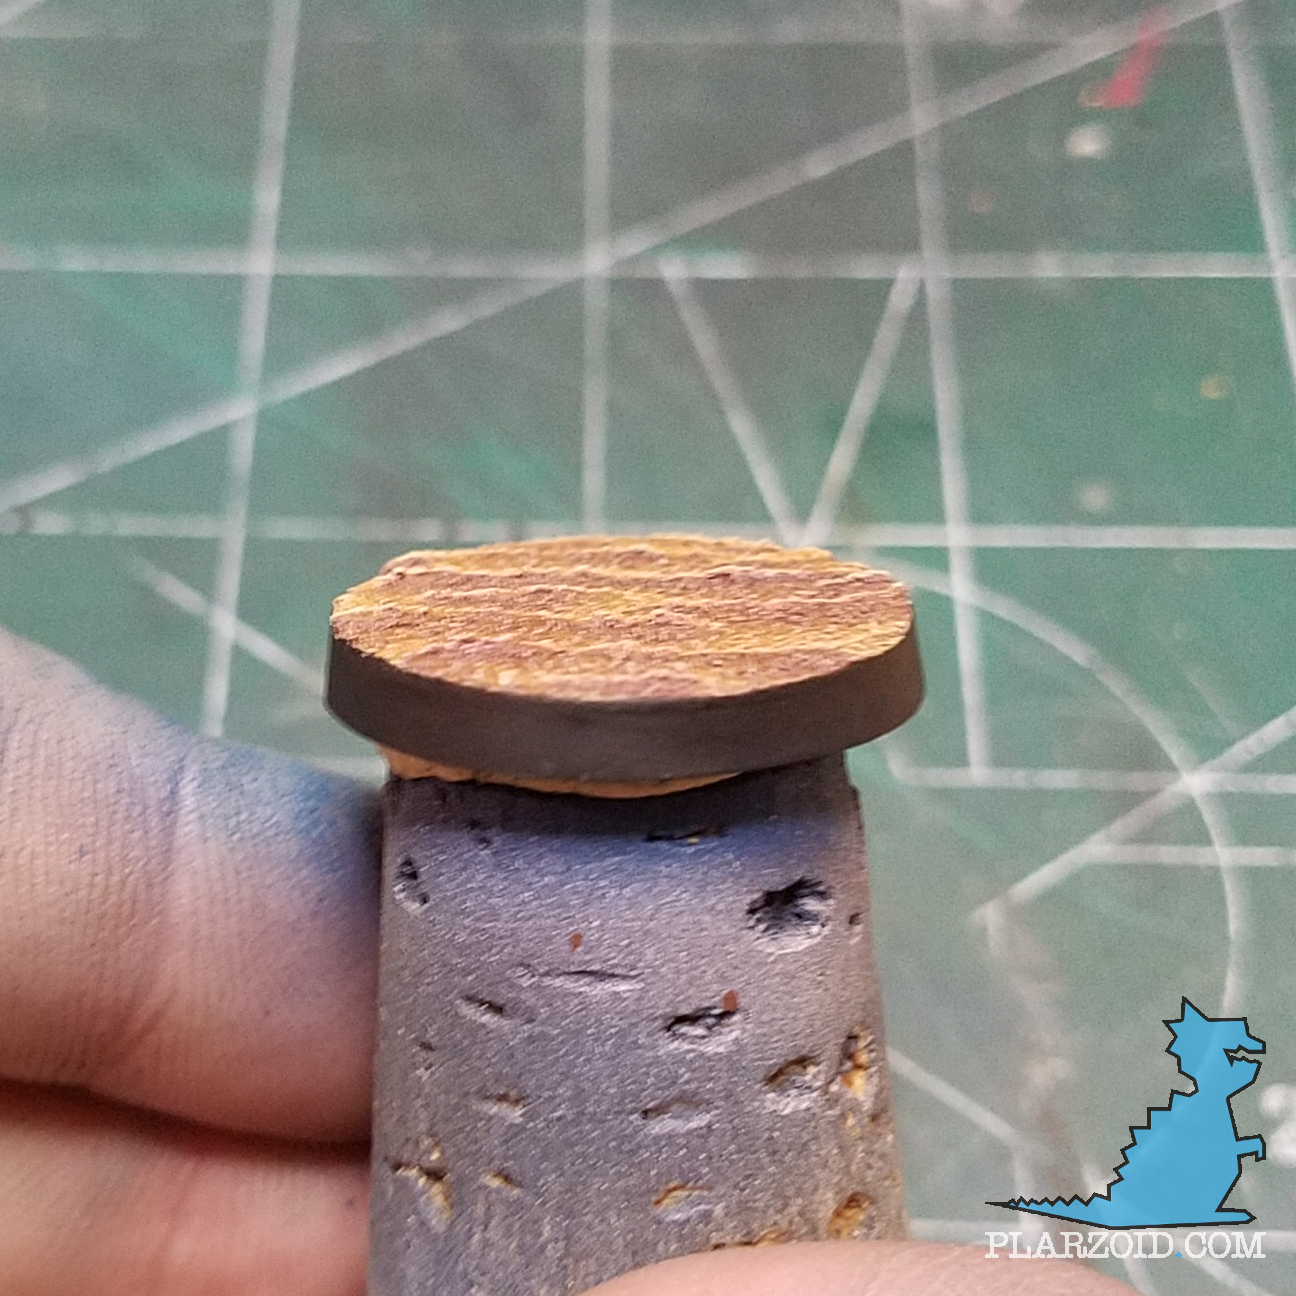
Once dry, we’ve got a nice set of three-dimensional waves to paint.
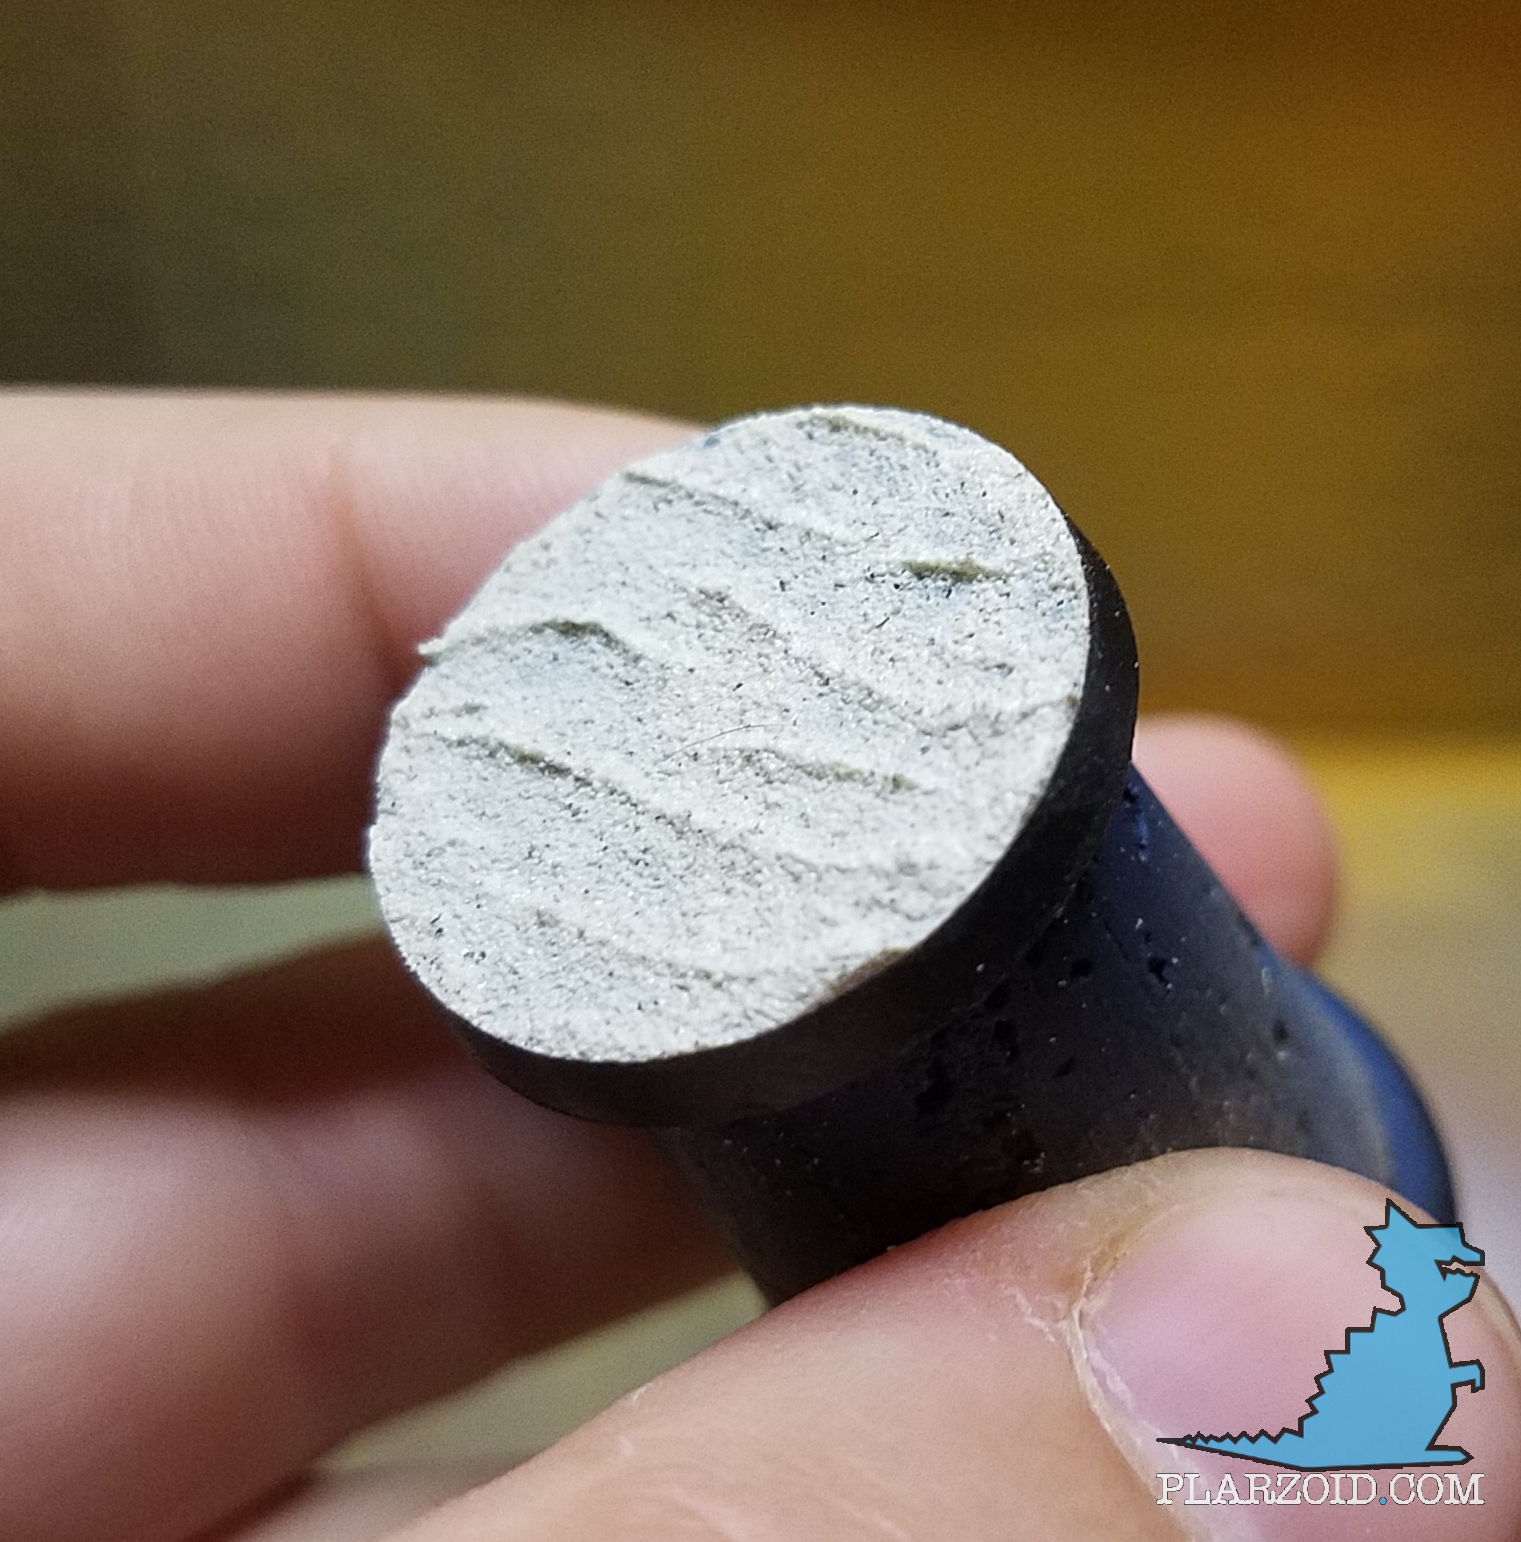
Before paint, though, remove any paste that got onto the rim. The dried paste is kind of spongy, and I don’t find it cuts very well, so this is best done by drawing a file from the top of the base to the top. If you go the other direction, the paste might start to rip apart as you pull it away from the base.

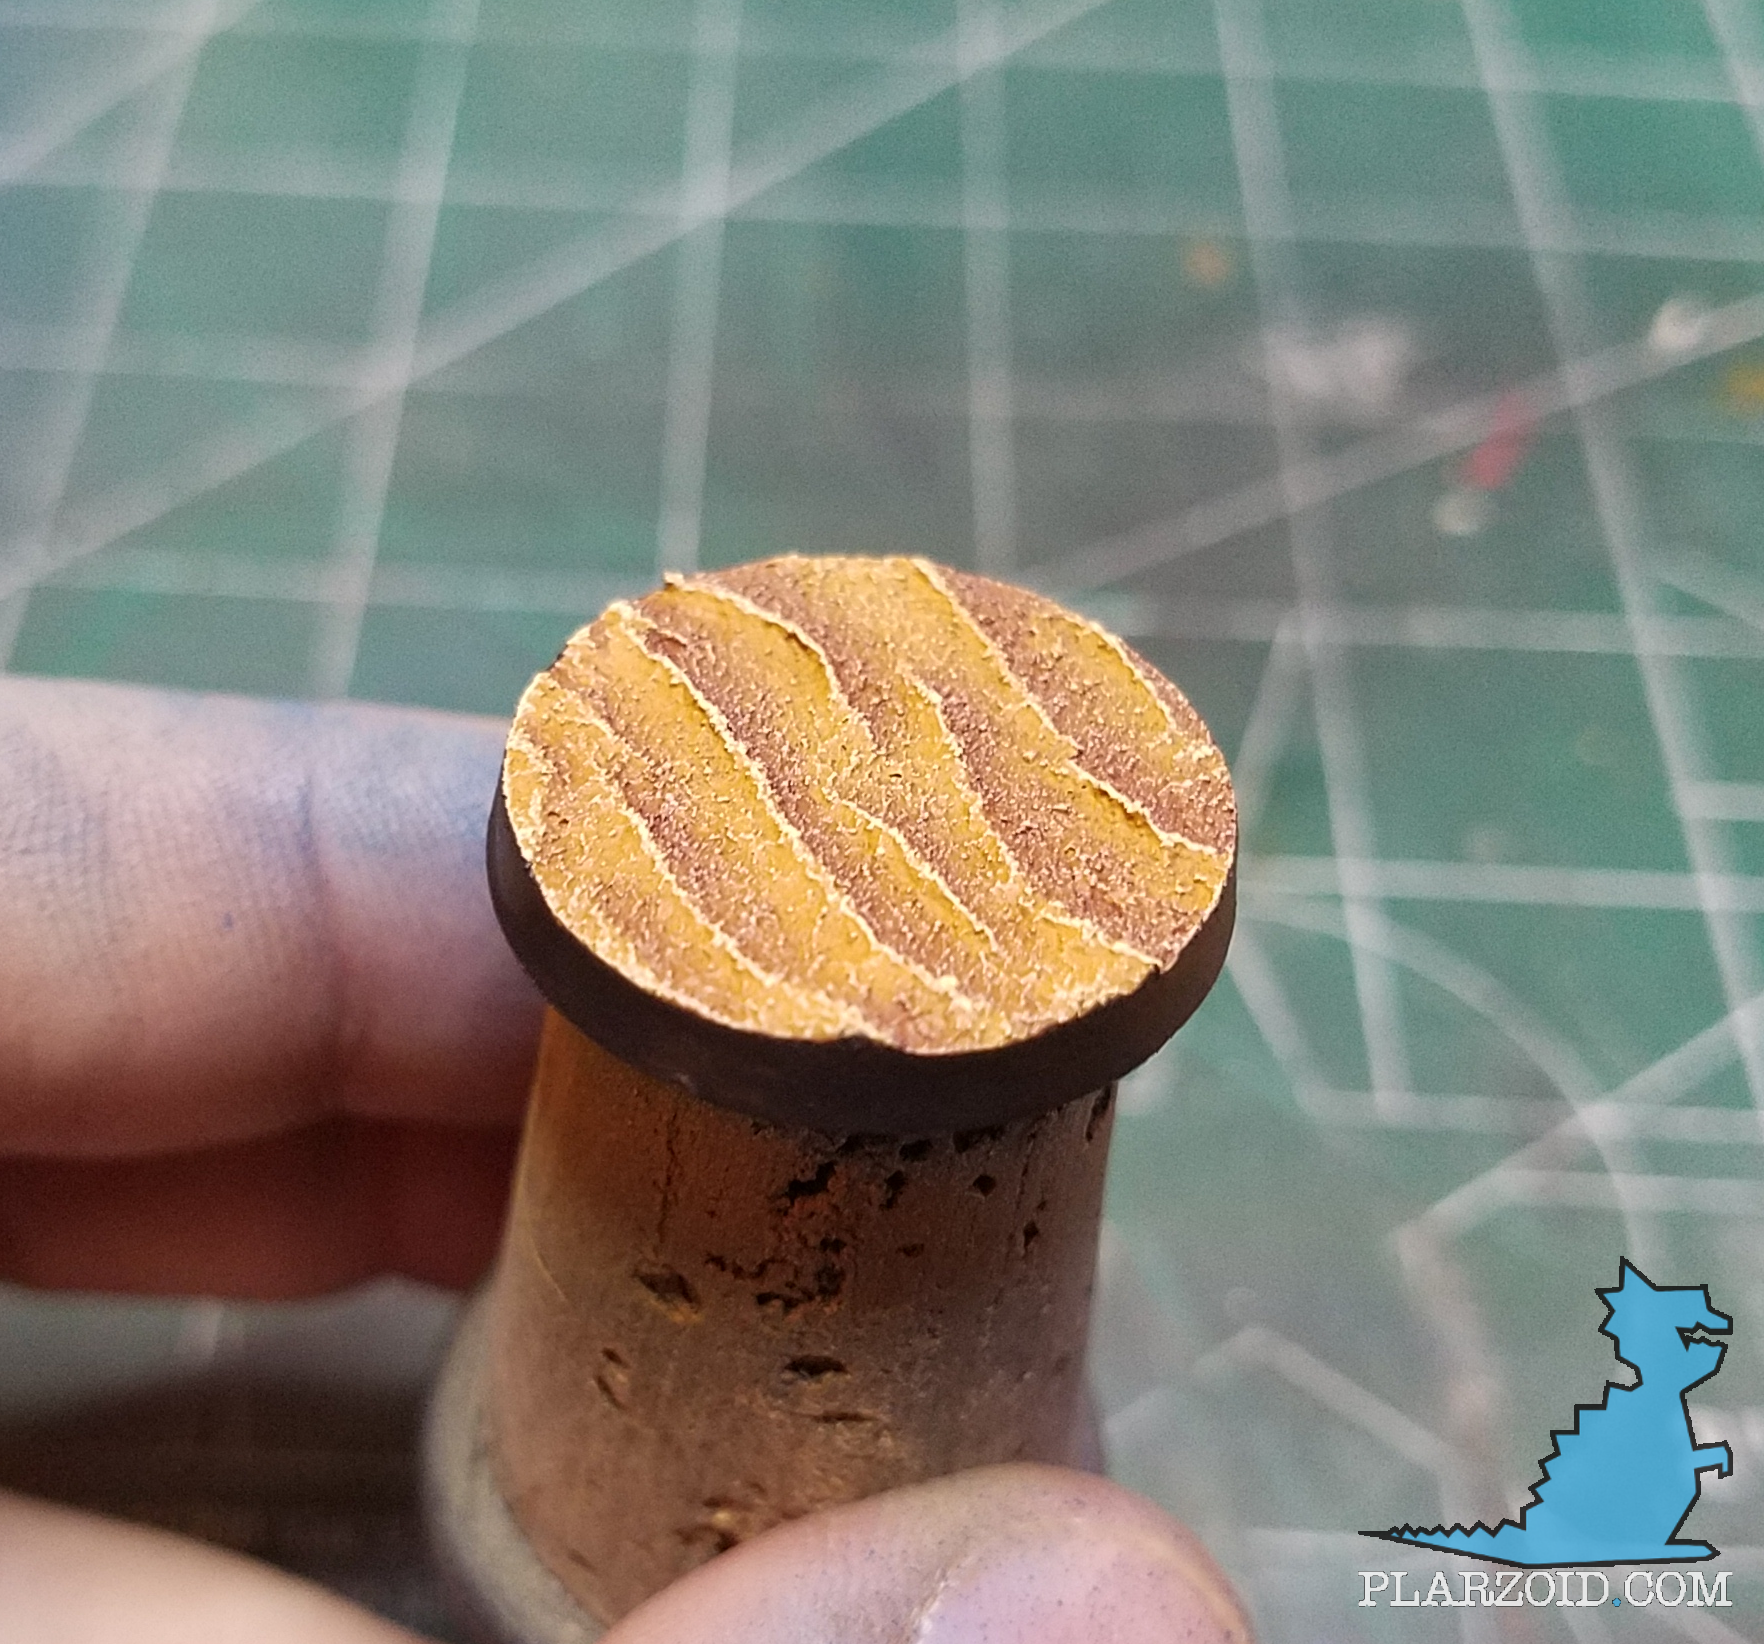
After this, it’s grey primer (Vallejo for me, because it’s airbrush ready) followed by Red Rust by Secret Weapon Miniatures. The rust acrylics from SWM are amazing – definitely pick them up if you don’t have them. Obviously, they’re useful for a lot more than just “rust”.

The contrast on these bases is created by putting one side of the waves in light and the other side in shadow.
After that dries, it’s decision time. Which side of the waves are on the sun side, and which are in shadow? After you’ve picked, hit the base with Orange Rust by Secret Weapon Miniatures at a 45-degree angle.

After that dries, bust out the Yellow Rust and hit the base from straight on the edge to maybe 5-10 degrees. We really only want to hit the sides of the waves with the yellow.

Only two more colors to go! (Ok, three, if you count painting the rim black.)
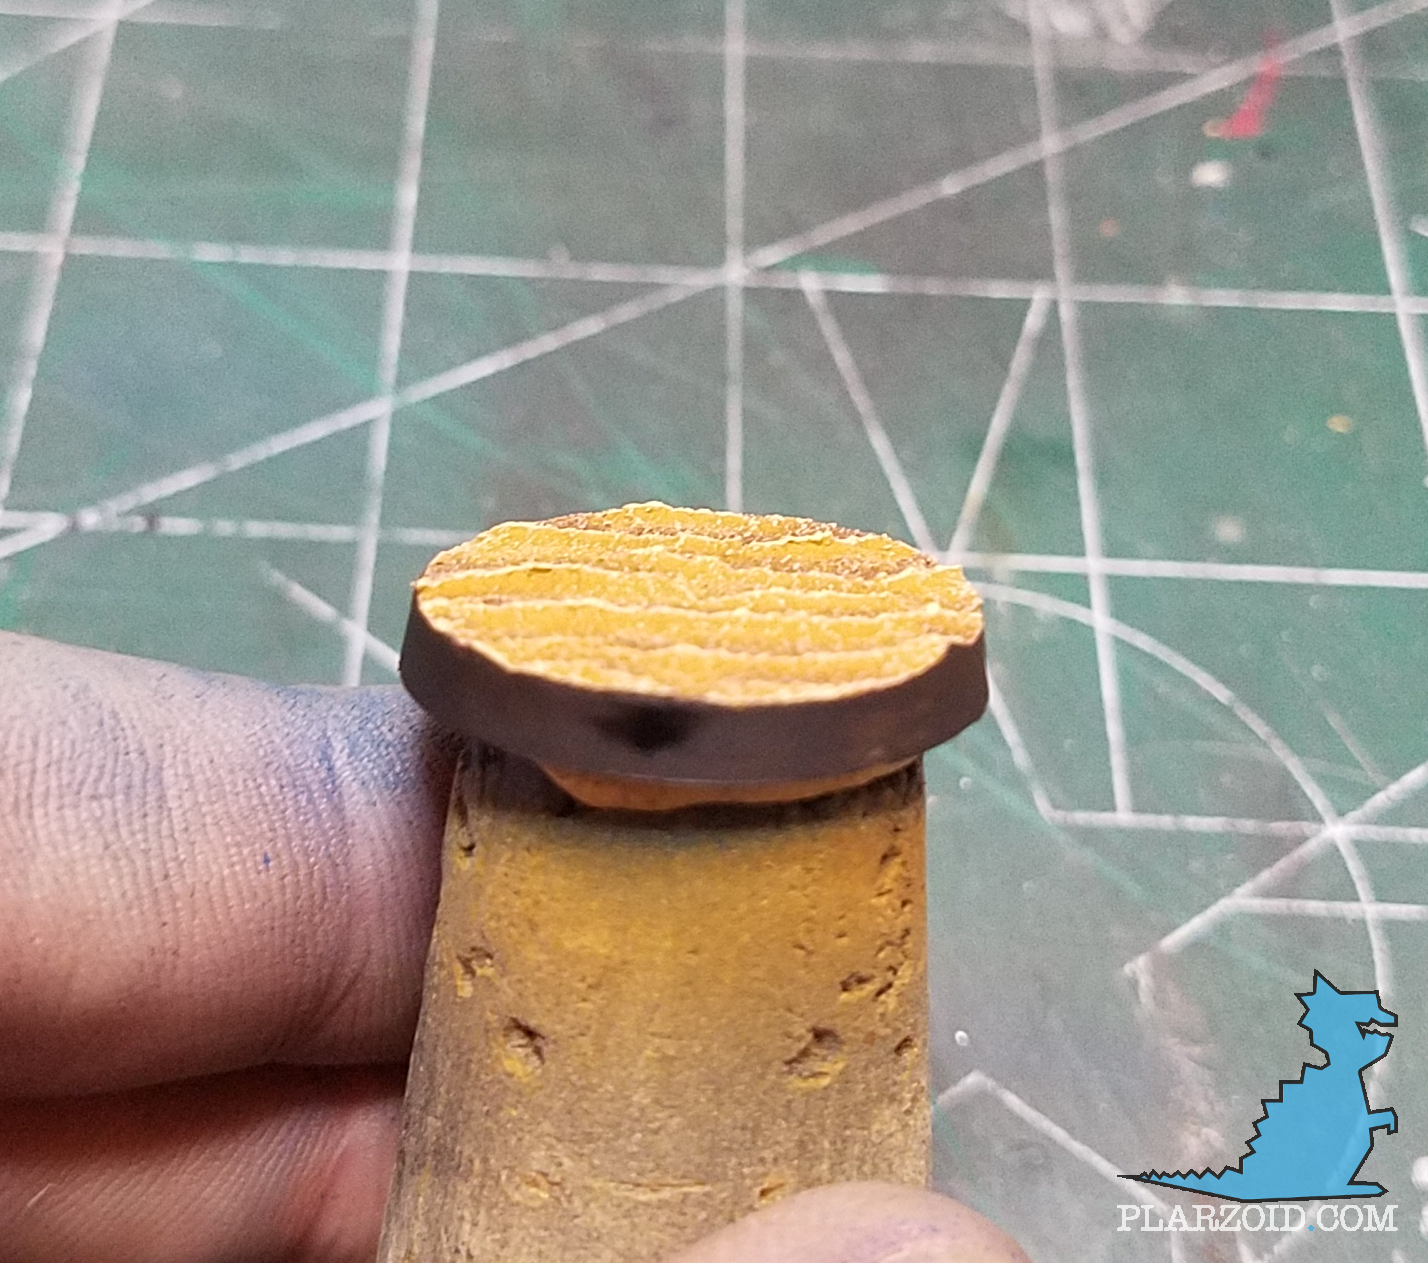
Next up is Vallejo Ivory which is drybrushed to pick out all the lovely texture we got from the sandy paste. I do this in two stages:
First, in the direction of the sunlight, to catch the peaks.

Then, about 45 degrees around the base in each direction, to catch the texture in between the waves. Don’t drybrush from the dark side to the light, highlights don’t belong in the shadowed areas.

(This shot is from the dark side)
Lastly, we bring in some Druchii Violet from Citadel for the shadows. To do this in a nicely blended way, have a spare brush damp with water on hand.
Add it straight from the pot, or watered down just a tad, and apply in a line along the back of a wave.

Then, use the spare damp brush to feather the wash out so it fades and doesn’t draw a hard line. This also slightly weakens the wash. This is good because you can always add more layers of it to strengthen the effect – it’s rather difficult to remove it…

Rinse, repeat for the shaded sides of all the waves. Strengthen the shadows as you see fit. Taller peaks cast harder shadows, and divots or tight valleys could be pockets of darkness.
The last step is to paint the rim black.
If you paint your rims any other color, you’re wrong and you should feel bad.
Period.
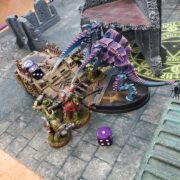
Here’s our final product!

Beautiful bases, I was sure they were resin until I hit this tutorial. Happily I have both a(n endless) need for desert bases and the very paste / tool you used! I’ll try to give this a shot on my next KOW army, see how it works on a slightly larger scale.
Great, I’d love to see your bases when you get some done!
Amazing work! Just what I was looking for. Was looking for a easy way to make easy sand dune bases for my thousand sons army. Thank you for sharing!
Thanks, I’m glad it’s useful!!