How-to Tuesday: Convert Cinerators into Bastions
When the 2-player starter hit shelves, I immediately purchased one, as it was the best way for me to supplement my Khador ‘jacks, and get my hands on the new plastic Man-O-Wars. It also began my Menoth collection.

Now, my meta is fairly Khador heavy, so there were also ample opportunities to split these boxes with folks – which gave me another Menoth set. My spare Crusader will one day be a Fire of Salvation, and the Vanquisher will remain a Vanquisher, or perhaps it’ll become Blood of Martyrs, I’m not sure yet.
 But I, like many others, found myself with two units of Cinerators. Now, I’m a huge fan of shields – I love the idea of the ol’ sword and board. That said, I couldn’t think of a situation in which I’d want two full units of Cinerators. So, I started thinking about the differences between the Cinerators and Bastions, and how to bridge it. Today I’d like to cover my method for putting these often ignored miniatures into use.
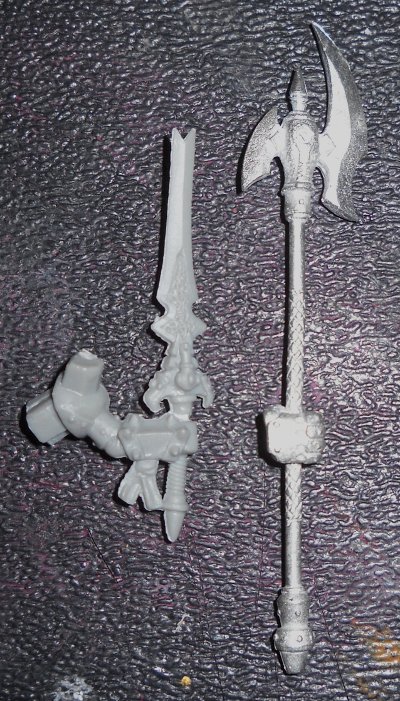
For starters, I bits ordered 5 Devout Halberds bits from the online store (And a Bastions Stat Card, too!). These would be the weapon replacements. See, that’s really the only differnece between the models. One unit has swords and shields, the other has polearms. So, first and foremost, I needed a weapon swap. Unfortunately, Menoth troops are severely devoid of halberds. The Devout one though, fits the bill nicely, in my opinion.
The weapon swap works just like brass-rodding a weapon, except you’re substituting the new weapon for the old, and instead of replacing the shaft with brass rod, we’re pinning everything together.
I clipped just above and below the sword hand, leaving just the clenched fist. I drilled straight through with my normal pinning bit, and dropped a pin straight through, leaving plenty of length. I did the same to the Devout Halberd, except this time, the shaft and weapon are the important bits. They received pin holes, and got glued onto the rod through the fist. Done!
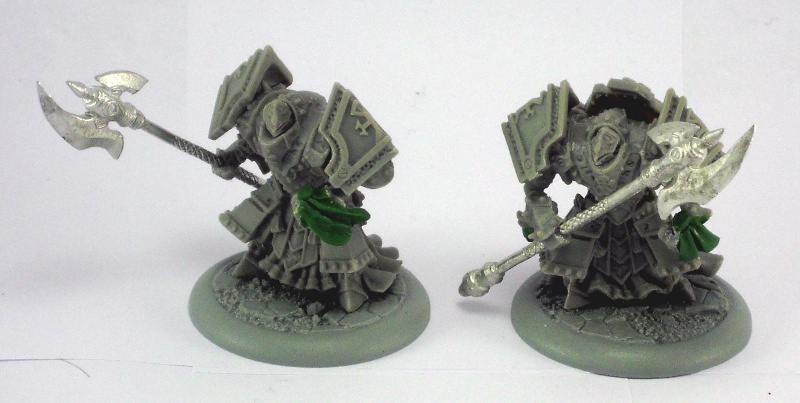
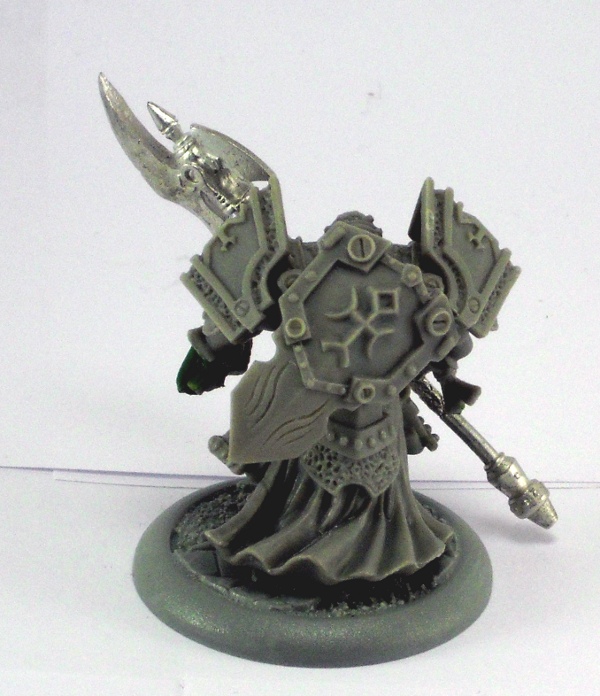
Now, the shields attach to the arm with a giant peg into a matching hole on the arm. How on earth do we cover that up? Easy! Ribbons! Menoth models are covered in little ribbons – I’m not sure if they’re symbolic, or what, but they’re everywhere. So, I trimmed down the excess material on the forearm (which equates to the shield’s handle) getting it into roughly the same size as the other arm. Then, fill in the hole with green stuff. Lay down a pair of snakes, and smush them around until you get something vaguely ribbon like. Top it all off with a tiny blob that you squish flat, and square up into a knot on top.
And, because I just can’t say no to awesome looking shields, I clipped off the pegs, used a blob of green stuff, and stuck them on the Bastion’s backs, ready to use later in the battle.
OH MAN! I’m definitely doing this after my extreme Kreoss conversion! Can you bring them on Thursday for me to ogle?
Yep, they’ll definitely be there!
Easily the best version of these that I’ve seen. Devout halberds was a great idea. Were any of the Cinerator poses possible to two-hand the halberd?
I have only done these two so far, but I’m definitely looking at this. Since the plastic is so easy to work with, it should be fairly easy to cut, pin, or heat and bend the arms into new positions. Unfortunately, both arms have the hands vertical, and no where near in line with each other, so a 2-handed pose will definitely be more work.
Stay tuned for next week, I’ll take pictures as I try to make one or two, and post that up for next week’s article.
Love this conversion! Very nice, I really want to get one of those two players sets as well, and may just have to steal your idea here. I think I would use the bastions way more then the cinerators. Hey would you be up for doing a green stuff tutorial sometime. I really like the ribbons you did, and would love to know that ratio’s you use and your sculpting methods. Nice stuff as usual.
I can certainly put something together! Stay tuned!
Sweet!
I wish I could order bits as easily here in Europe! Nice conversion by the way.
Thanks!