How-to Tuesday: Magnetize a Plastivean Kit
I was lucky enough to get my hands on a “Legion of Everblight Plastic Heavy Warbeast Kit”, or what I’m calling a “Plastivean”. The parts look quite a bit like the metal heavy warbeasts, but with the familiar keying of parts. 27 parts to be exact (standard black base not pictured):

In my opinion, this kit’s absolutely amazing. The mold lines are in the best possible places, and they’re not difficult to clean up. There are lots of them, so it’s an undertaking to be sure, but the results are fantastic.
Read on to see how to assemble and magnetize this beast!
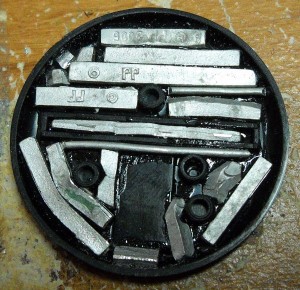
I knew I was going to magnetize Proteus to this kit, so I started with the base. Rather than order a metal base and have to wait, I went to my parts bin and pulled out all the spare tabs I’ve clipped off models. I then played Tetris, and glued as many as possible to the bottom of the base.
Once dry, I then flipped it over and glued the bottom layer of cork down, and flocked the edge like normal. I then cut out a circular region of the cork in the middle. I then filled that with spare pewter.
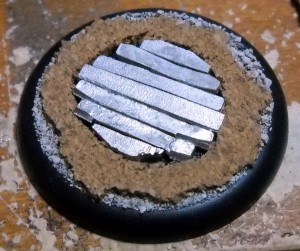 This added plenty of heft to the base, hopefully offsetting the big chunk of metal that is Proteus’ head.
I then sealed off he metal on top with a layer of cork, effectively hiding it from view. I have no idea if this method causes the base to be heavier or lighter than a standard metal base, but I do know it was enough for Proteus.
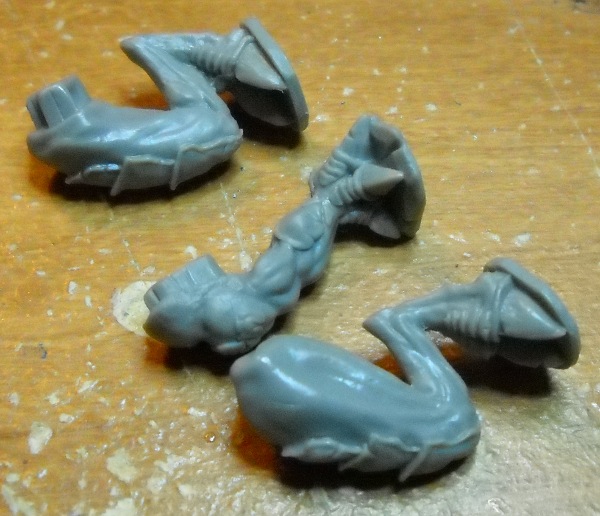
While all this was going on, I used my jeweler’s saw to cut off the slabs molded onto the bottom of the feet. Yes, they are still present on the plastic model, but even if you don’t have a jeweler’s saw (which melted the plastic more than cut it), the plastic should be fairly easy to clip and cut and file. Much easier than metal, that’s for sure.
Once the feet were done, I started some assembly. I glued the upper torso to the lower torso, and then glued on the Ravagore/Scythean Tail. The kit comes with two tails, one that bends left, and one that bends right. The kit has two bags of parts – one has a complete Carnivean, and the other bag has the arms and heads for the Scythean and Ravagore. Obviously, this was done for the Battleboxes; they would get only the bag with parts for the Carnivean.
I also glued together the two parts making up each arm for the Scythean and Ravagore. These glue joints all got some green stuff to smooth the gaps. They’re not bad joints at all, but I’m a perfectionist, and they bugged me. The nice thing about having legs separated from the torso is that it’s much easier to smooth the torso and tail joints without the legs in the way.

After all the joint cleaning and the pedicure, I glued on the legs and pinned the whole thing to the base, as far back as possible.
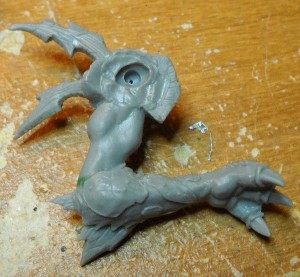
I then started looking at how to magnetize the arms. They use a method similar to the Scythean / Ravagore – the torso has a bubble, and the arm has a matching void. I used my flat file to file down the peak of the bubble, and then drilled a hole big enough for the magnet. For the first arm, I picked a polarity at random.
I then drilled a matching hole in the arm. The arm hole was placed mostly by best guess. Due to the way the magnet is drilled into the arm, and the resulting geometry involved in cutting a chord across a circle, and then mating to that plane, there’s plenty of room for the magnet in the void in the arm. You just need to give it something to glue into.
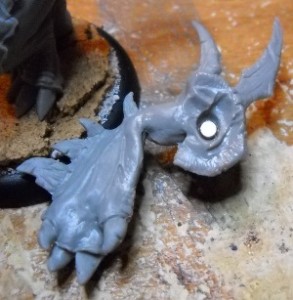
Here’s how I got the magnets into the arms. First, here’s what the hole looks like:
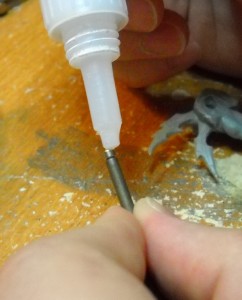
I then placed the magnet onto the magnet in the torso, to get the polarity correct. I pulled the magnet off the torso by hand, and used a spare dremel bit to hold the magnet by placing the bit on the same end of the magnet that is attracted to the torso’s magnet. You can test that you have this set up correctly by putting the magnet near the torso magnet – they should repel each other.
Then, put some glue on the end.
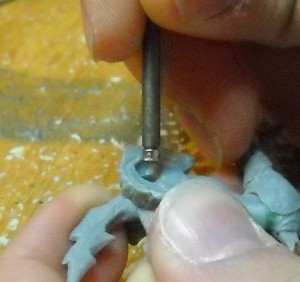
Then put it into the hole in the arm.
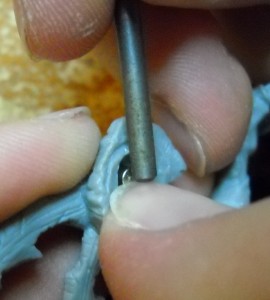
Use a fingernail (or some non metallic object) to unstick the dremel bit from the magnet.
Then, stick the arm to the body, and hold it in place for a minute or two. You don’t have to press hard, you aren’t trying to glue the parts together. Just keep the arm in place, try not to move. The magnet in the arm will connect with the arm in the torso, and by holding the arm in place, the magnet in the arm will be in the correct location, and the glue will set. Then, you can pull the arm off.
Rinse and repeat for the other arms and the entire other side. You can do the heads in the exact same way.
Once you’re all done, you get some great results!

Yes, his arm is not in the normal Carnivean pose. When I was inspecting the parts in my kit, some of the spikes on the arms had gotten bent. No surprise there. I heated water up, as I’ve done before, and used that to set them straight. I also took advantage of the pliability of the plastic to bend the Carnivean arms, which are one piece. Easiest repose, ever.


Proteus’ war cry shall be:


Plastivean it is! Nice tutorial. I still have my plastic helljack kit waiting for some magnet lovin.
Get to it!
Looks really good, thanks for the guide. I am going to have to magnetise my warpwolves soon!
I’m looking forward to the other plastic kits as well. I need to stock up on magnets, too!
Thank you for the tutorial! I’ll soon be magnetizing this kit as my first magnetizing job, so I’ve got a question — for tools, do you need a dremel to make the magnet holes? I just have pin vises, will those work, but just take longer?
Pin vices will work fine, especially for all plastic kits like these. If you’re going to be working with metal fairly often (and you do when you primarily work with PP models) then a Dremel is a huge time saver.
To avoid cracking the plastic, remember to step your drills sizes. For instance, when I’m drilling the 1/8″ holes for the magnets, I start with a #67 bit which I use for pinning (0.032″) and then go to a 3/64″ bit, then go to the 1/8″ bit. Takes longer, but gives you a cleaner hole.
hey, nice stuff… cant wait to get a few kits and magnetize emm… question: is the proteus kit just the head? no arms, spikes, or anything else?
Thanks!
Proteus is 5 pieces, but it all assembles to just the head. It uses the Ravagore arms.
thanks!
hey plarzoid… can ya do me a favor… i know this is kinda crazy but can you throw up a pic of proteus with carny arms instead of rav arms? i have a spare metal carny unpainted and im thinking of putting the proteus head onto that instead. and i was gonna look into getting the metal rav arms from PP but between the $5 cost of each shoulder and 4.50 for the lower arm and PP’s shipping cost i think i may keep the carny arms unless it looks awful. anyway thanks.
Sure, take a look at these:
http://smg.photobucket.com/albums/v499/Phrixus/Warmahordes/Legion/?action=view¤t=Proteus_Carnivean1.jpg
http://smg.photobucket.com/albums/v499/Phrixus/Warmahordes/Legion/?action=view¤t=Proteus_Carnivean2.jpg
Great Job. Just perfect. Can you remember the size of the magnets. ?
They’re 1/8″ diameter, and 1/8″ thick.