How-to Tuesday: Process Pictures of Models
I’ve never been a fan of photoshopping pictures of models, but there is something to be said about ensuring that a picture is true to the subject, and is presented well. To that effect, I do a bit of editing to the photos I put up here, and today I’ll take you through this quick and painless process.
Here’s a picture of some of the first PP models I ever painted – a unit of Widowmakers. These are from about 4 years ago, as evidenced from the paint job and horrible photography. However, it’s a good example to work with, so here it is:
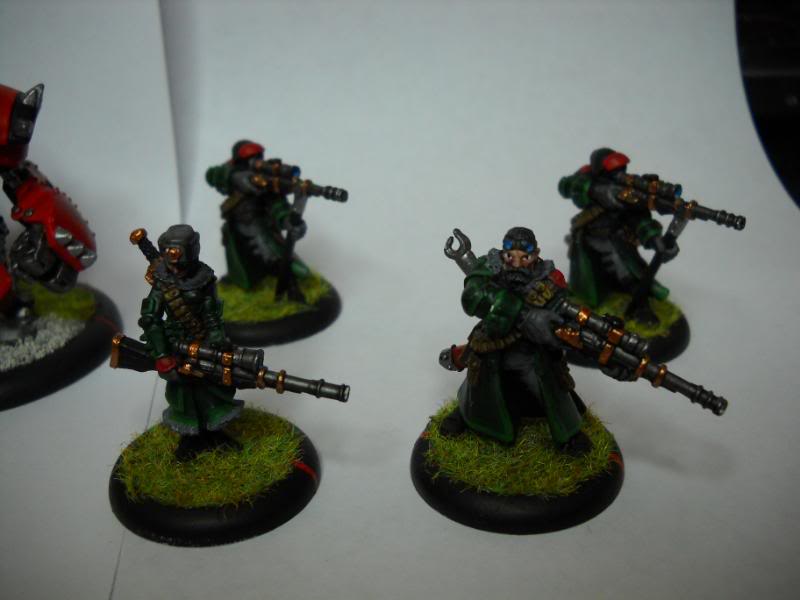
It’s dark, the back guys are out of focus, and there’s stuff on the sides that take your attention off the models that the picture is actually trying to show. Not all that great.
The photo editing software I use is GIMP (GNU Image Manipulation Program), and it’s open-source and free to download and use. You can get it here, on the official site: www.gimp.org. It’s really lightweight, works quickly and it easily has most of the features of Photoshop that you’d pay loads of $$$ for.
Step 1: Start GIMP, Load Image
This part’s pretty obvious. Once installed, you can right click an image and choose “Open in GIMP”, or just start GIMP and open a file like you do in any other program.
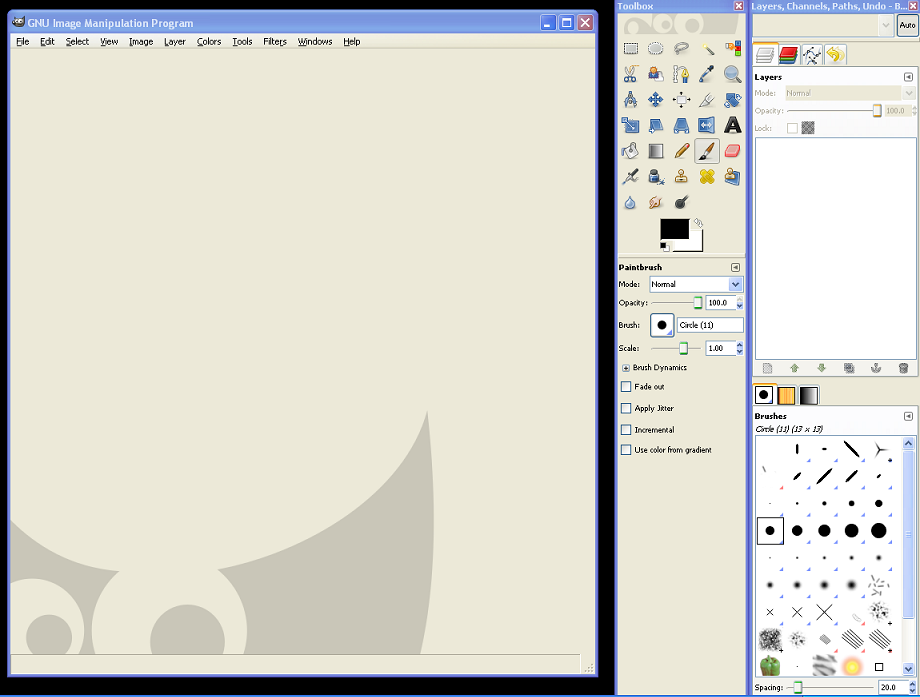
The GUI is fairly simple – three windows appear. One is your toolbar, it has all the different tools that let you manipulate pictures. Another has the list of layers, as well as a brush selection pad. The big one is where the picture loads, and it also has the traditional File-Edit drop-down menus we’re all familiar with.
Once your picture is loaded, you should be looking at something like this:
Step 2: Crop
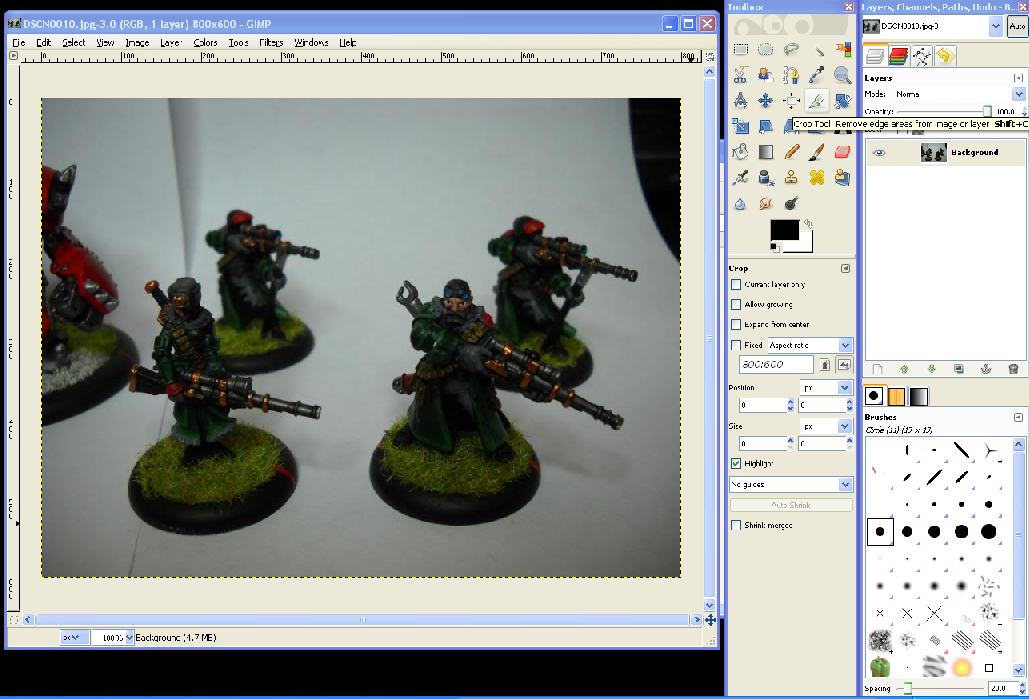
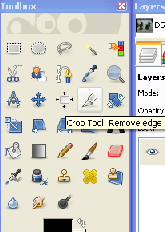 So, in my example photo, the subject is centered, which is good, but there’s some extra stuff on the sides, and lots of extra room on top. That extra stuff makes the picture larger than it needs to be, which means the subject isn’t as large as it could be. Time to crop the good stuff, and drop the bad stuff.
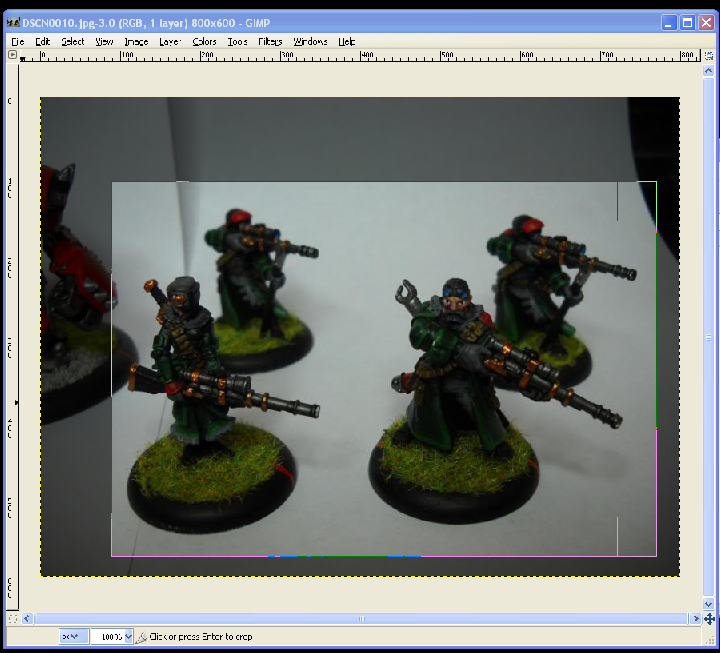
Grab the crop tool, it looks like the hobby knife. Select the section you want to keep, and you’ll see the excess go dark, like so:
While in this state, you can drag around the borders and corners of that box until you’re happy with how it looks. GIMP is nice and gives you really big handles you can click on to move the edges around. When you;re happy, hit enter and poof, all the darkened areas are gone!
Step 3: Color Correction
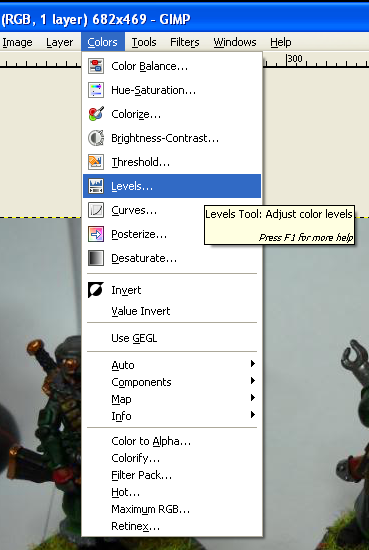 When a picture is taken, the camera does it’s best to accurately represent what it sees. But, what it sees may not be an accurate representation of the object. This could be due to shadows, inadequate lighting, a cheap or bad camera, etc. This color correction step attempts to reduce that misrepresentation.
So, open the Level Tool: Colors -> Level…
This tool analyzes the pixel in the photo, and comes up with several tidbits of useful information.
Most of that I don’t care about. I’m just trying to make the picture look as close to the model sitting on my desk as possible.
So, when the Levels Tool Dialogue pops up, I just hit the Auto-Correct button:
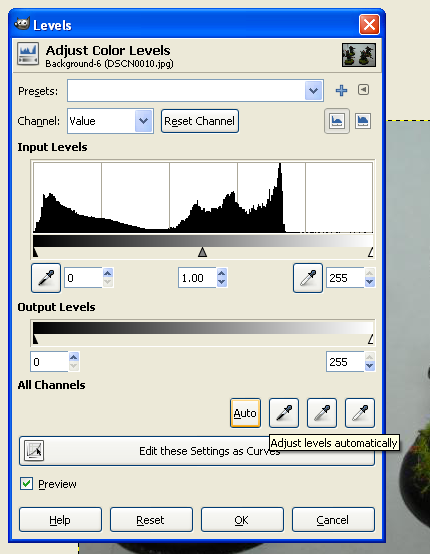 What this does is pretty cool. It looks through all the pixels and picks out the one closest to pure white, and the one closest to pure black. It then stretches those pixels until they actually are pure white and pure black. Then, once it knows how it had to adjust those two pixels, it adjusts all the rest of the pixels in the picture accordingly.
So, if your picture is too dark, it won’t have to adjust the black much, but it will have to lighten the white pixel, so the entire picture gets lightened. Likewise washed out pictures get more saturation. If your picture’s too red, it knows that the picture is skewed red, and will reduce the red levels in the entire picture. It’s awesome.
Click OK, and we’re almost done.
Step 4: Save-As
Always do your best to save the processed picture as a new file. I don’t do this as often as I should, which is why I had to search so hard to find an unprocessed picture for this tutorial. Saving as a new file uses space, sure, but it also makes sure you have the original in case you ever need it.
Here’s the original Photo:

And here’s the processed photo:
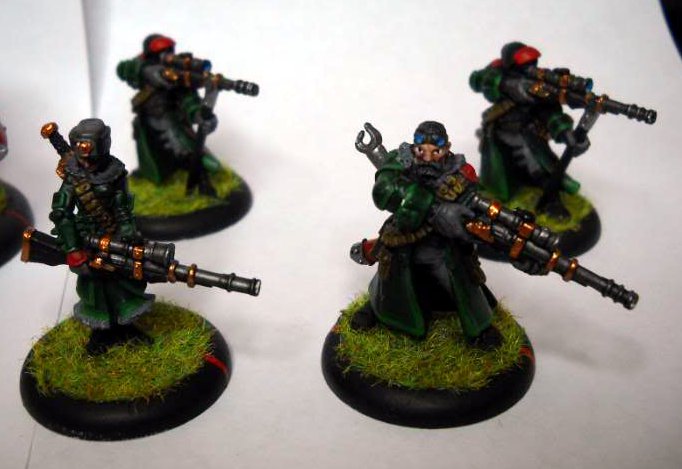
Now, it’s still not a great photo, but that’s due to how it was taken. The final photo’s colors are closer to the actual models, and the models are bigger in the photo, despite the fact the photo takes up the same space on the screen.
Overall, the process takes about 30 seconds to a minute per photo, and it’s not a difficult thing to do at all. I think it makes a world of difference in the quality of pictures, and when you’re trying to show off a model, what’s the point if you can’t actually see it?

I also get a lot of use out of Scale Image in the Image menu.
I have my camera set to take shots at least twice as large as I need them, so I’ve got the detail there if I need it, so generally am resizing everything I take before it goes online. Better to have the image the right size in the first place than to force the size in your HTML.