How to: Basic Conversion
So, I’ve recently decided I want to try painting some Eldar. Yes, I know they’re a GW product, but they look so damn cool! One of the auto-includes for almost any Eldar army is a Farseer HQ choice with the Doom spell. Doom lets any Eldar unit re-roll wound rolls on the targeted enemy unit / model. Wahoo! So, I figured a farseer model would be a good, cheap way to try out painting Eldar.
 |
| Studio Warlock Model |
The problem is, there isn’t a Farseer model that has the pose I like.
What I did find was what are essentially lesser Farseers, called Warlocks. They’re cheaper (points wise), and basically tag along with a unit to protect or guide them. One of them has the pose I want (and I’ll probably buy him just to paint it, because IMO, it’s an awesome model). I love the shooting pose here. Combined with the mask, it has a sense of stoicism and finality.
I want a Farseer that carries the same feeling!
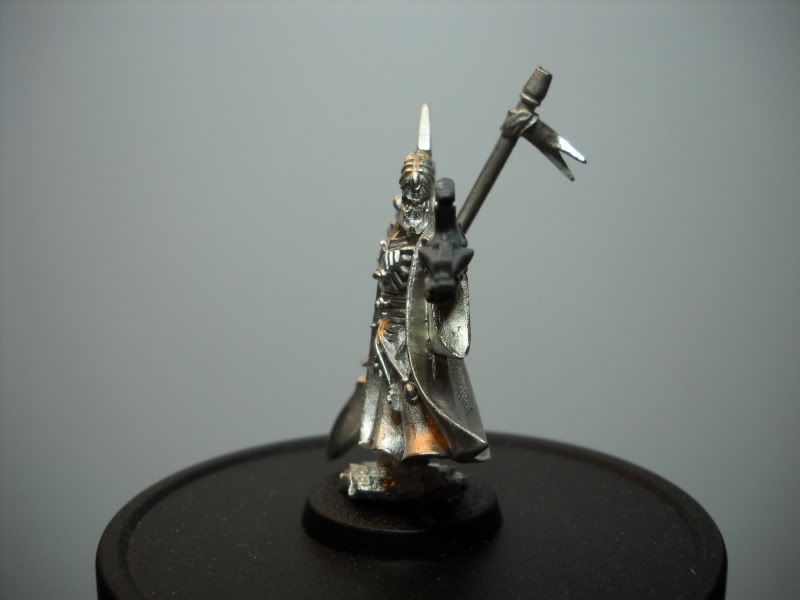
So, I had to find a stock Farseer model that would work with a little modification as possible. Enter “Eldar Farseer with Spear”.
 |
| Eldar Farseer with Spear |
It’s pretty darn close to what I want! He just lacks the important bit – a gun. In the world of conversions, that’s not a hard thing to change. You just need a donor. Something that has a gun and won’t miss it!
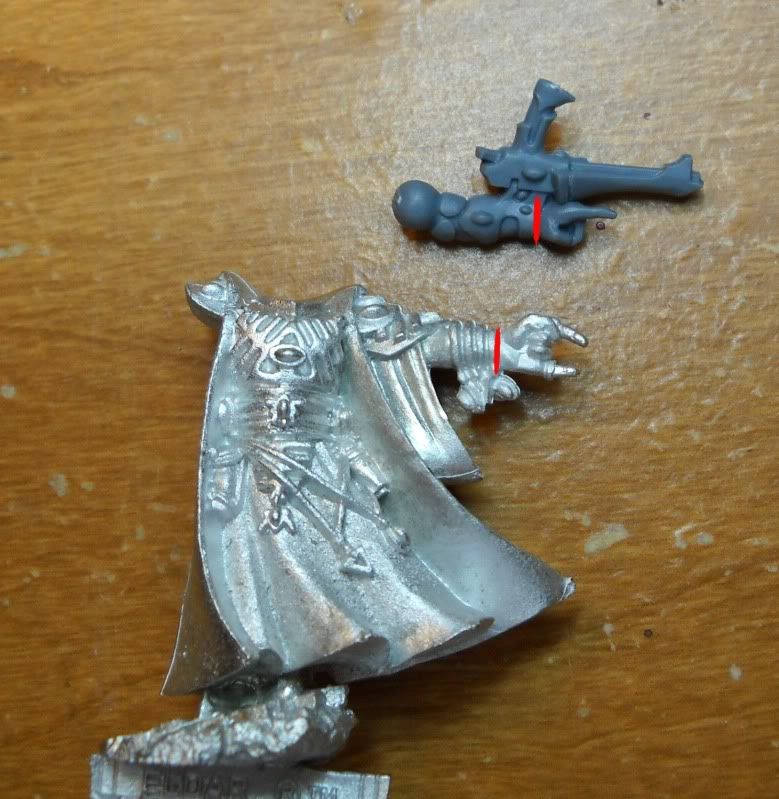
 With GW models being mostly plastics, there’s always extra bits they include to use up spare room on the sprues. Sometimes it grenades, ammo pouches, spare pistols, fancy doo-dads, or what-nots. I got lucky, because the only unit of models I own for Eldar are Dire Avengers, and on their sprue is a great bit.
Not only does it have the gun, it’s also pointing, so it feels even more leaderish! The next question is how to attach it to the Farseer’s arm. At first I figured I could just chop at the wrisst and replace hands. It works on most Space Marines. It won’t work in this case though, as you can see the gun extends fairly far up the arm, and that could be an issue. Another way would be to cut at roughly the elbow, and keep the entire brace holding the gun on. It would mesh fairly well with the robes, hiding the seam.


|
|

I decided to cut at the elbow. Mainly because it hides the seam, making the conversion even easier. I may not even need green stuff!
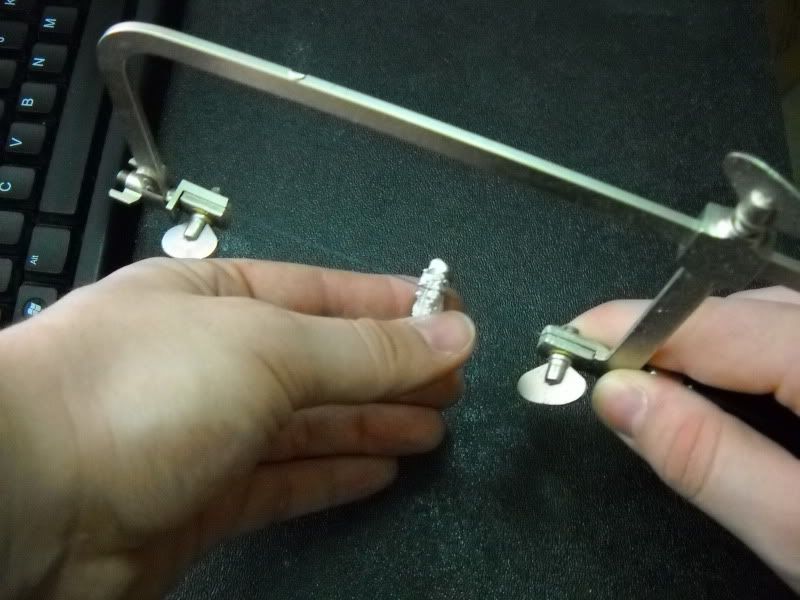
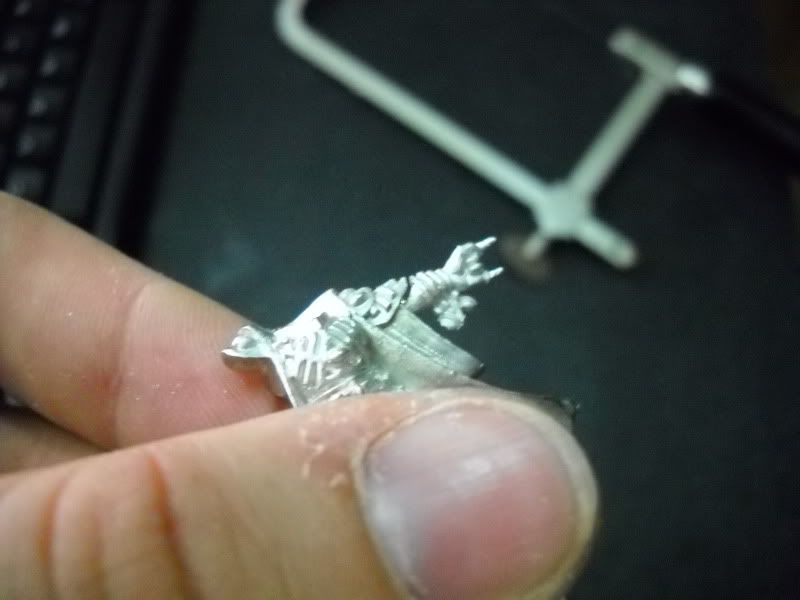
Hacking the arm off the metal guy could be done with clippers. Since the arm coming off is a throw-away, I really don’t care what happens to it. However, for the sake of the audience, I used my jeweler’s saw so I could show you some basics on using one.
Jeweler’s Saws are just like other saws you’ve used to cut things. They have teeth that do the cutting and a handle that lets you guide the blade. However, jeweler’s saws use a very thin blade. They break terribly easily. It’s annoying. But, they certainly do a much neater job cutting.
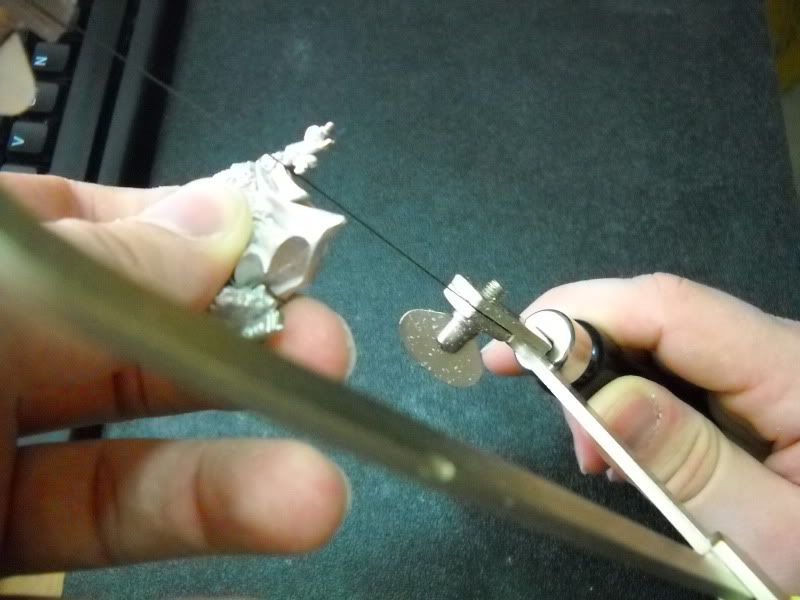
Here’s how I hold the saw and miniature:

It’s not anything special. Just have a firm grip on the model, and a loose one on the saw. Any movement of the model may bind the blade and break it. It takes some practice to get it right. Just go slow, and keep adjusting until the blade doesn’t catch.
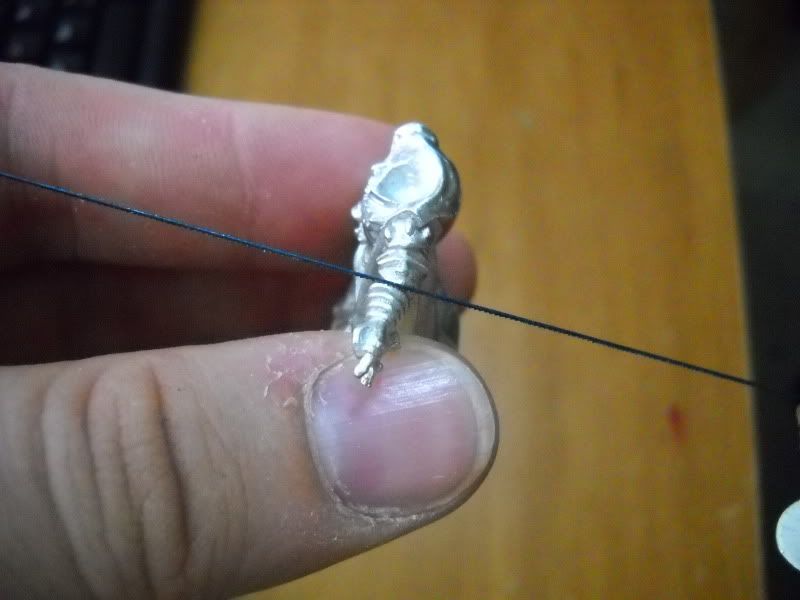
I started cutting at the seam between the arm and shoulder armor.

After a dozen strokes or so, I check my cut depth and that I’m not cutting at the wrong angle (destroying the shoulderpad or leaving too much arm).

So far, so good! Another dozen strokes or so and I check again. I don’t want to saw into the cloth of the robe.

I’m getting close! Just a few more…

I’ll stop there. I could go a bit more, bit I really don’t want to ruin the cloth part of the robe. Now I start sawing upwards from the bottom of the arm towards the armpit, using the robe as a guide.

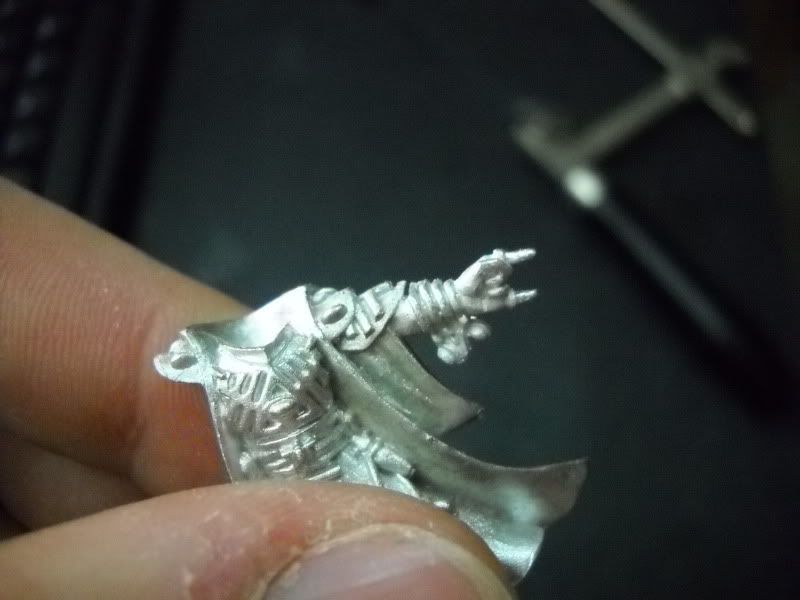
After a bit, I get something that looks like this:

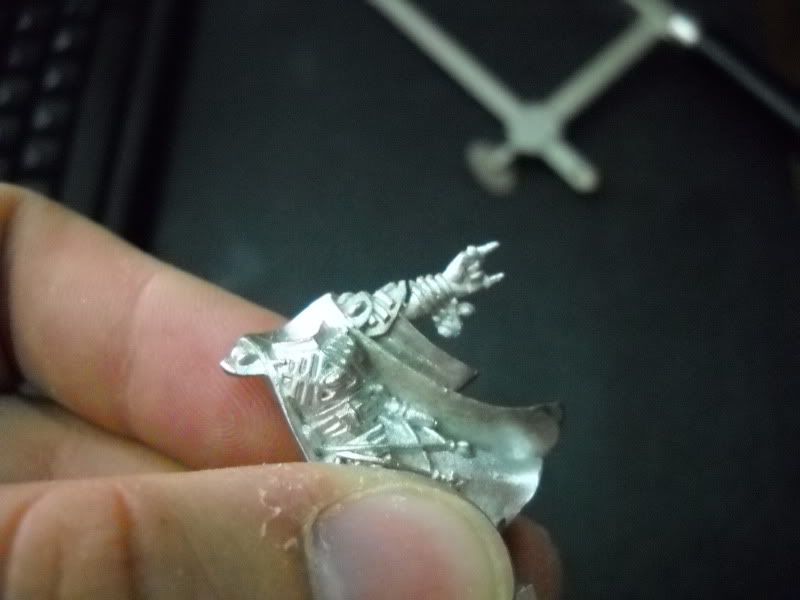
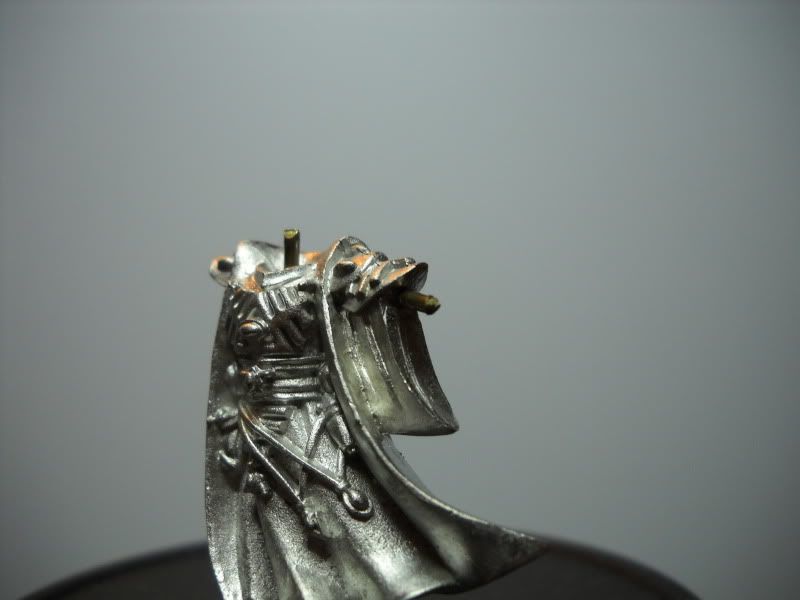
The arm is barely hanging on! Perfect. At this point, I wiggle the arm until it breaks off. I then use my hobby knife and files to clean up the area.

I then use the saw to trim off what I don’t need from the plastic bit. I also dropped pins into all the joints – both arms and the neck.

Some superglue later and I have the model I was after!

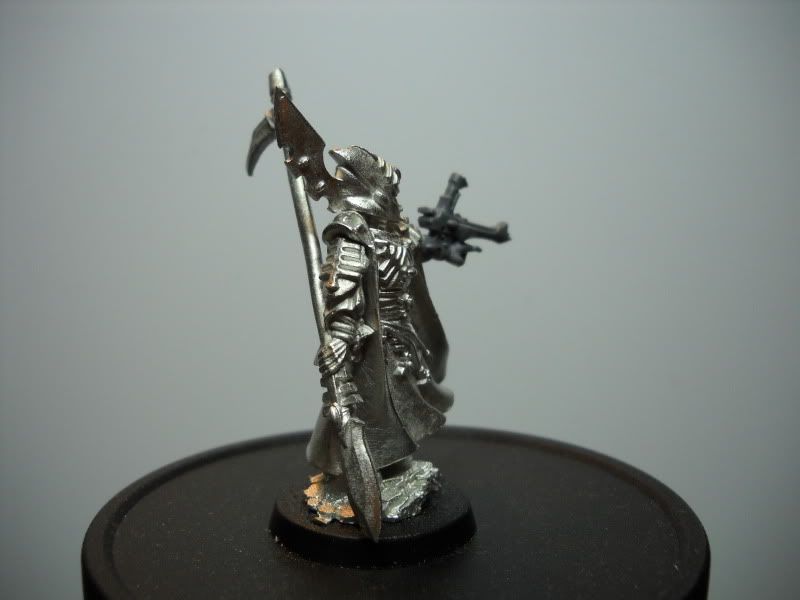 |
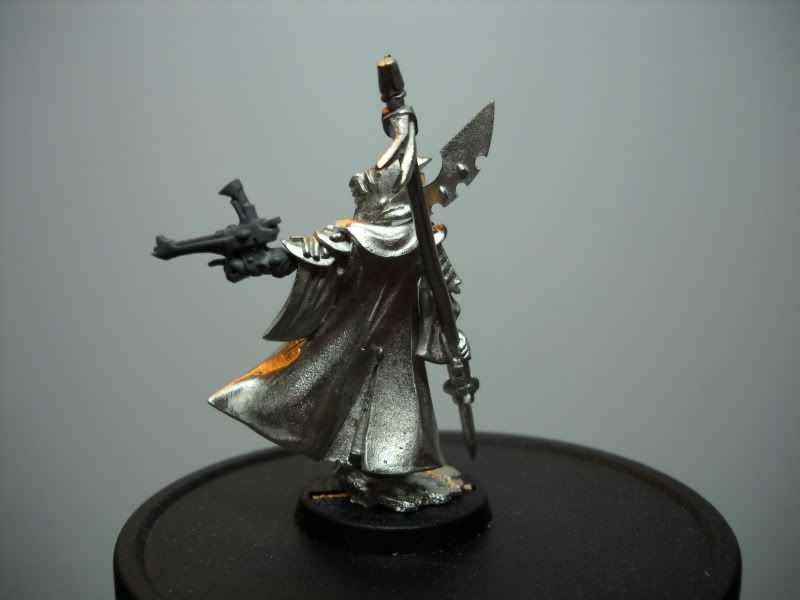 |
 |
|
I've been an eldar player since Rouge Trader days and have always loved the models. However, I'm not always a fan of the limited number of poses. I've converted several of mine, which you can see here if you're interested (http://i48.photobucket.com/albums/f215/Mugu2112/Eldar/CankerwormandFarseer.jpg, http://i48.photobucket.com/albums/f215/Mugu2112/Eldar/Farseer02.jpg, and http://i48.photobucket.com/albums/f215/Mugu2112/Eldar/EldarWarlock02.jpg). I find that Warhammer Fantasy high elf bits/parts make great conversion parts.
Nice conversions! Good thing I have some HE too then, eh?